
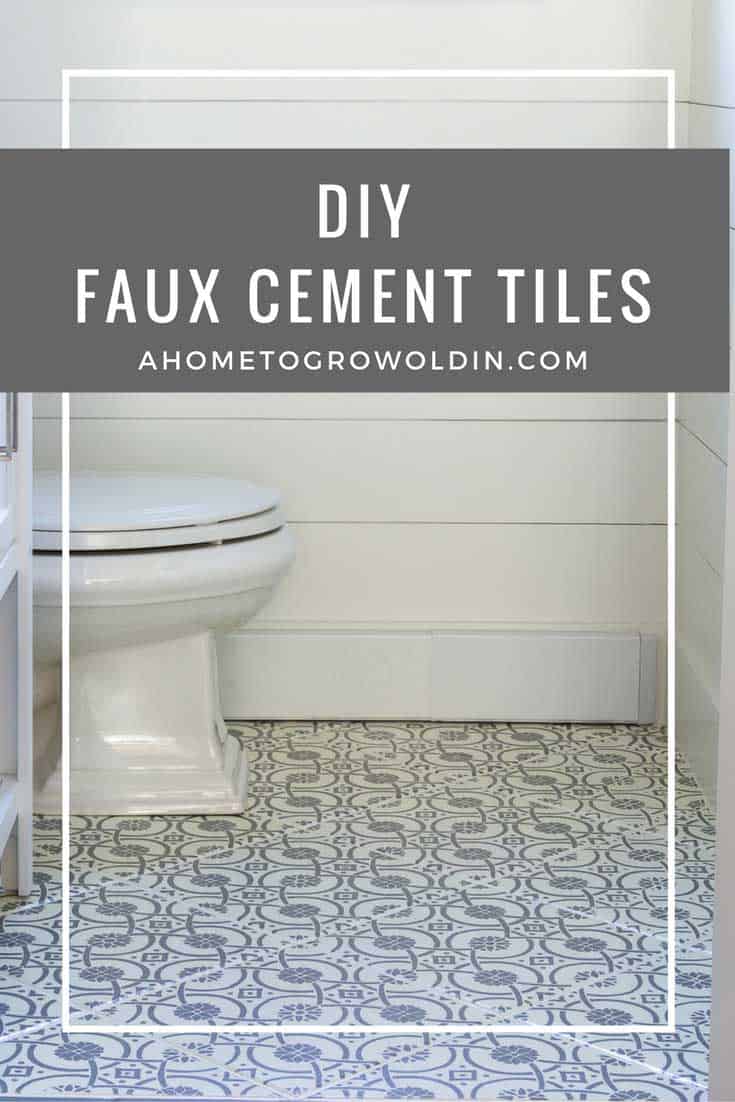
Welcome back to week 4 of the One Room Challange and my powder room makeover! Guys, I am so excited to share my progress with you today. Do you ever get a crazy idea in your head of something you want to try, but you have no idea how it will really turn out? Then, you actually get it done, and it’s just like you pictured in your head. Well, that’s pretty much the story of my faux cement tiles.
This post contains some affiliate links for your convenience. Click here to read my full disclosure policy.
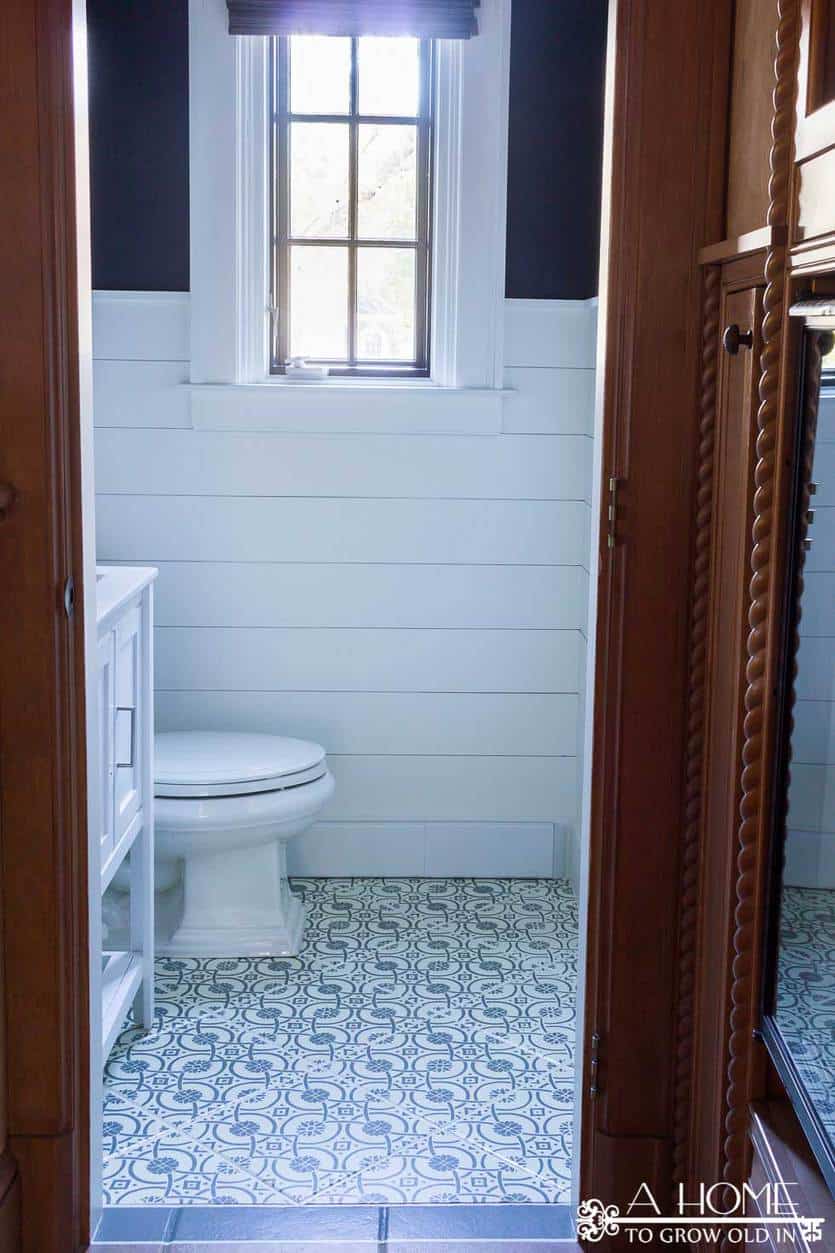
You may remember from my inspiration pictures that several of the bathrooms had cement tiles. I love their bold patterns, but I’m not really up for removing our current tiles and installing new tile right now.
The first thing I did was clean the floors really well with a TSP substitute before starting to paint them. I didn’t want anything on the floor to keep the paint from adhering well. Then, I used a shellac based primer, B-I-N from Zinsser, on both the tiles and the grout. I’ve written about my love for B-I-N several times before. It’s the most amazing primer if you’re concerned about paint getting paint scratched or chipped off. It dries lightning fast and hard as nails. so it’s easy to get 2 coats on within an hour. Because B-I-N is shellac based, it fairly difficult to clean up. I usually use an old paintbrush and roller that I don’t mind throwing away when I’m finished.

I used 2 coats of the same base color on the tiles as the baseboards, planks, and trim, which is White Dove from Benjamin Moore, however, I had Sherwin Williams color match it in their satin Proclassic. Once I let the base coat dry overnight, it was time to get stenciling!
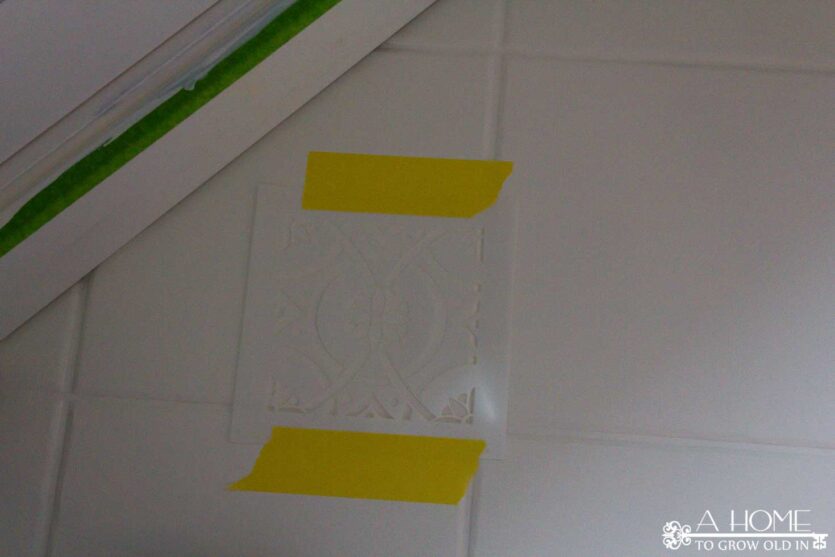
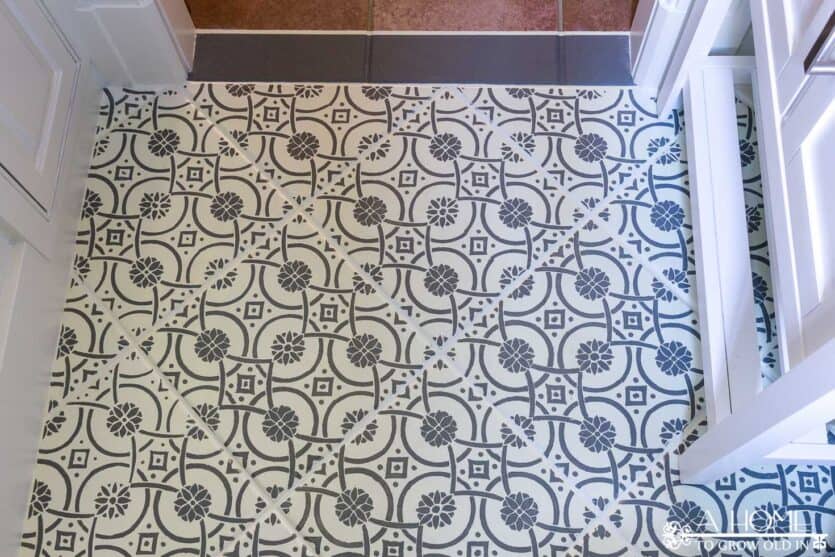
Royal Design Studio was so great to send me their Eastern Tile stencil which worked perfectly with our 12 inch ceramic tiles! They have so many incredible stencils to choose from that I had a hard time picking out my favorite, but the Eastern Tile stencil was just the right size, and it reminded me of the patterns on the cement tiles that I loved so much. The have great tutorials on their website on how to stencil that you must see before you get started on your own stenciling!
Much to my son’s dismay, I used his paper plate as my palette. Oh, you should have seen the poor child’s face he saw what I was doing with it! My bad! I poured a small amount of paint onto the plate. A little paint goes a long way!
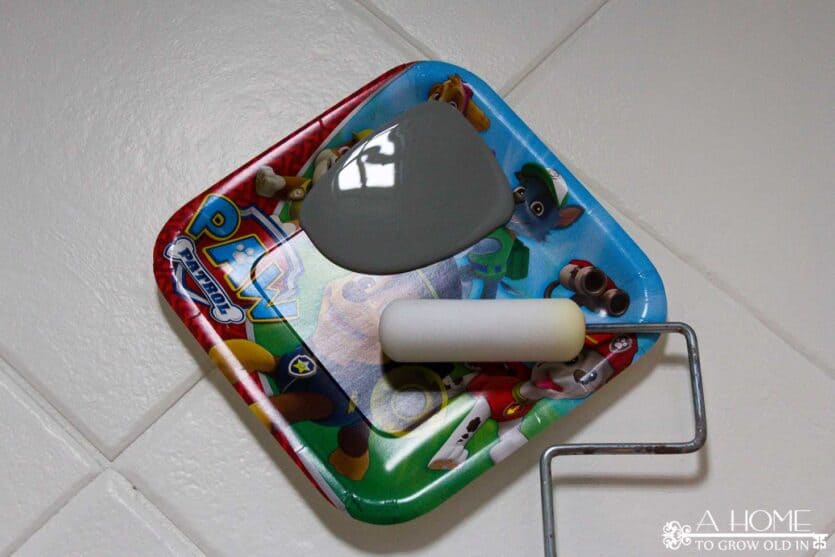
The biggest thing I learned in stenciling is to use as little paint as possible. Once I had the paint on my foam roller, I would roll off as much I could onto a paper towel before applying the roller to my stencil. Painter’s tape worked great to keep the stencil from moving.
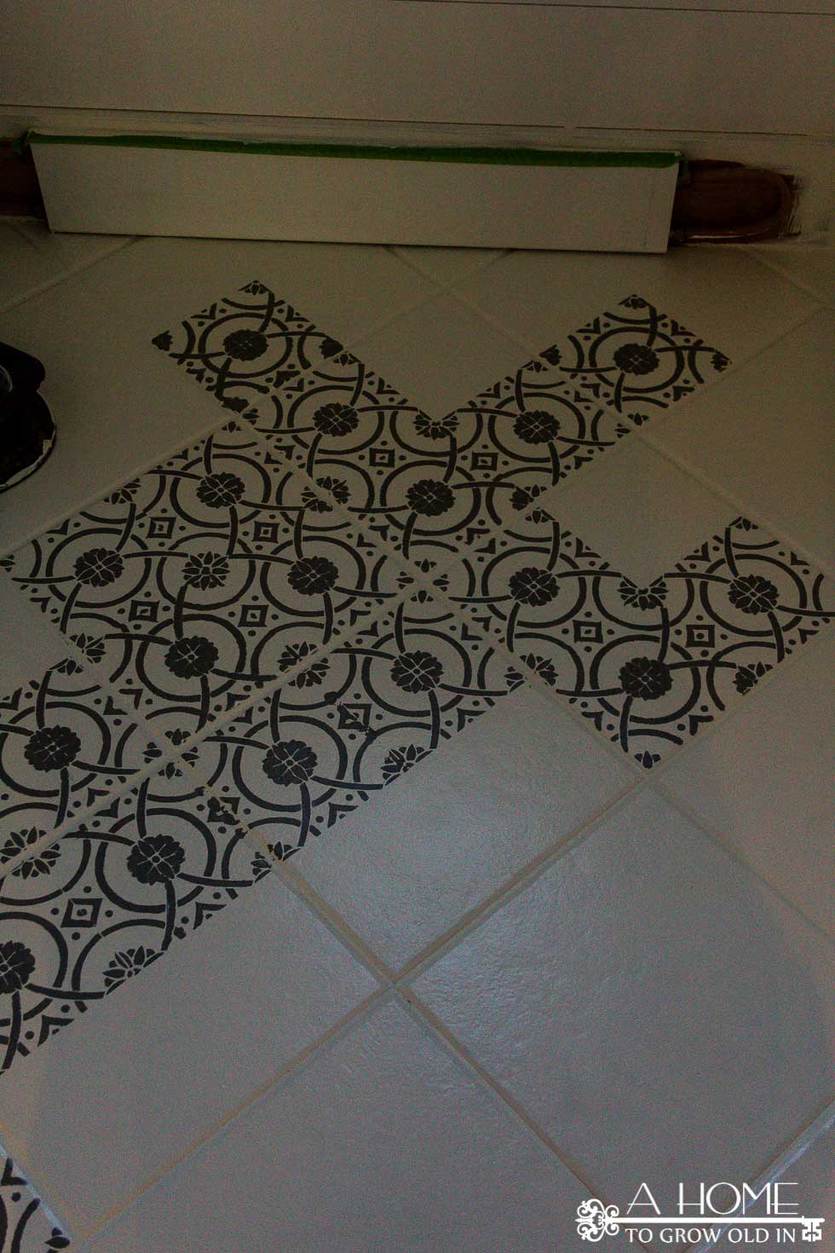
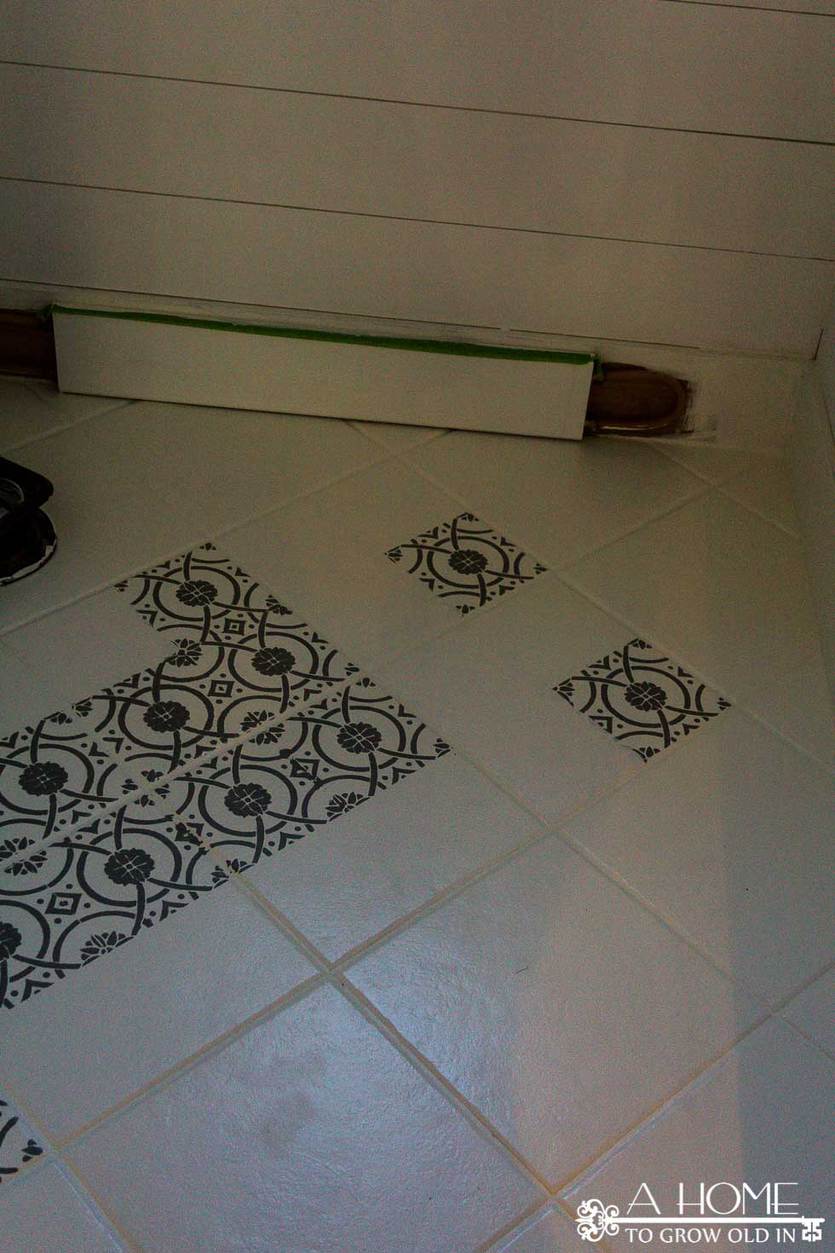
One of my biggest fears about painting my tile floors was that somehow I would mess this whole project up. And, guess what? I did just that. I was completely horrified when I realized that I painted the stencil in the wrong direction on several of the tiles. It’s a little difficult to tell in the picture below, but I have an entire section that I had to paint over.
Surprisingly, it wasn’t as difficult of a fix as I imagined. I used this awesome tiny roller that I just wrote about in my favorite paint supplies post to prime over the messed up tiles and then reapplied my base coat.

Here’s how it looked just after I painted the base coat on the messed up tiles.
Once I stenciled all of the tiles, I used a small artist brush to touch up any areas where the paint had gotten under the stencil.
Here’s my one little beef with this project. My last step was to apply a sealant. The guy at the paint store convinced me that I needed a floor poly and not just a regular poly to hold up to foot traffic. I bought a water based floor polyurethane assuming it would not yellow because it’s water based. It was incredibly easy to apply with a lambs wool applicator and does not show any overlap marks. I’m a little disappointed because it definitely did yellow the tiles a bit. I have checked the bottle of polyurethane 3 times to make sure it wasn’t somehow oil based, but it must just be how it’s tinted for wood floors. The floors still look amazing, and I am so happy with them. They are just a slightly off white color now. I was taking a huge chance on my faux cement tiles, so if my slightly off white floor is the worst part of it, I’ll take it. If I were to do it again, though, I’d look into a different type of sealant.
What do you think? Do they look like the cement tiles in my inspiration photos?
There are only 2 more weeks until the big reveal! I hope you’ll be back next week to see the progress. You can sign up for my email newsletter so you won’t miss it! Email subscribers also have exclusive access to my printables library that has a recipe binder, gift tags, pantry and spice labels and more! Also, don’t forget to check out the other participants in the One Room Challenge. I’d like to give Linda from Calling it Home a huge thank you for another great makeover week!
You can get caught up on other weeks here…
Week 1– Before Pics and Inspiration
Week 2– Design Board
Week 3– How to Plank Walls


This is BRILLIANT! I had no idea this was possible. What a GREAT way to get the look for less….LOTS of work, but heck, it looks AWESOME now!! Totally pinned this so I could remember it if I ever get the chance to try this out!
Thanks so much, Heather! I think this is the only time I consider myself lucky to have the smallest powder room ever! It surprisingly didn’t take all that long to get it down.
All I can say is WOW! That looks amazing! Can’t wait to see the finished space 🙂
That’s really sweet, Allyson! Thank you! All the little details are still left to do in the room, and even though they’re small, they sometimes take the longest to do.
How lovely! The flooring is looking wonderful ♥
Thanks, Summer! I’m really excited about how it turned out!
Love, Love, Love! Fantastic idea!!!
Thanks, Lidia!
STUNNING! Holy cow, now I want to stencil a floor. Truly, you did a fantastic job and it makes a huge difference. And I can’t tell the floor has a tint of yellow, but if you’re anything like me, that little thing is sticking in your craw. I bet you made a voodoo doll in the likeness of that paint salesman. And, if it continues to bug you, it’d be a heck of lot easier to change the paint on the wall to one with just a smidge of yellow in it.
Well done my friend…
Hugs, Lynn
That’s too funny, Lynn! I think I do have an old voodoo doll around here somewhere. It’s my fault for not doing more research, but who would have thought that floor poly would be so different from regular poly. I like your paint idea. That may be a future project!
these are incredible! i love the look and budget!
Thanks, Cassie! It really turned out to be a great way to get the cement tile look.
How lovely!! What patience this took. I was just telling someone else how terrible I am at stenciling. I might try this on a coaster or something, but I don’t know if I’d ever be brave enough to try a whole floor. Would love to hear how it’s holding up in a few months!!
Hi, Brittany! I definitely had a lot of touch up when I finished stenciling, and I did have a big section that I had to completely paint over with the base color. You really have to have some patience with it, but it was worth it in the end. That’s a great idea to update this over time on how it’s holding up by the way! Thanks for checking it out!
Wow! This turned out awesome!!!!! I would have never thought to stencil a floor. Turned out great. And my son would have been sad about that Paw patrol plate to, LOL.
Thanks, Kyla! You should have seen my son’s expression when he saw me using his plate! It never even crossed my mind when I started using.
This looks amazing! And we share our love for BIN primer. Man, I love that stuff so much.
Isn’t it funny how passionate we can get about paint products? Thanks, Emy!
I will be stenciling the floor in our foyer for our ORC. I have the base coat down and tried one pass at the stencil BUT had major bleeding. I also used Royal Design Studio Stencil (taped down), paper plate, and foam roller. Offloaded on a T-shirt. The floor is wood so I wonder if the slight texture had something to do with it. Thanks for sharing your fix of touching up with a brush. That will be my plan B. My husband picked up a stencil adhesive and stencil spouncer set today so I’m hoping to have another go of it tonight/tomorrow. Your floors look amazing!
Oh no! I hope your second try goes better. My first few attempts were awful! It’s definitely a learning process, and towards the end, I had very little bleed. Good luck with the rest of it! It takes a lot of patience, but it will be worth it for you.
Wow! It looks amazing! I’d be sitting in that powder room all day long staring at the floor!
I actually did that for a while, but my kids kept yelling at me to get out of the way. There’s not a lot of room in there. Thanks for checking it, Crystal!
Oh my goodness, it looks awesome!
Awww…thank you Amanda!
Wow! That looks amazing! Good job Robin.
Thanks, Jillian!
Wow! That looks really good. It’s a gorgeous pattern and colour.
Thanks so much, Norma!
Wow…wow…wow!!! I am totally in love with this floor! You did an amazing job. I always thought I was kind of stuck with tile until I was ready to replace it. Now I want to paint some tile. Your bathroom looks amazing!
Isn’t it a fun alternative to living with ugly tile? I’m so excited about it! Thanks, Tammy!
WOW! That looks amazing! I never ever would have thought about creating a faux cement tile look. I absolutely love it! Good luck with the last two weeks! 🙂
Thanks, Tricia! Ahhh…I can’t believe we only have 2 weeks left. This challenge always flies by for me. Good luck on your last 2 weeks as well!
Oh wow!!! LOVE how this turned out!!! What a brilliant idea!
Thanks, Kristi!
Robin, You are really rocking this room to a whole new level with your genius ideas! I’ve heard of painting and stenciling wood floors, but never knew it could be done with any other surface. The floor looks spectacular!
You are so sweet, Carol! Thank you!
Looks so very good! i can not believe how good the tiles turned out! This bathroom is going to be amazing!! Great job!
Thanks so much, Joy! I can’t believe there’s only 2 more weeks! Yikes!
It looks great! I’m going to take a peek at all the stencils available. I have been considering painting our entryway hall. It is currently ugly vinyl.
Stacy, I think this would work great on vinyl! I was nervous before I started, but I figured that I didn’t like our tile anyway, so I had nothing to lose. Good luck with it, and thanks for stopping by!
Wow! It looks fabulous! I did this on my old wood floor on in my kitchen and it was fabulous. Love how yours looks!
Also, what is the brand of the cleaner you used? I have been toying with doing this in the kitchen at my new house but now you’re making me thinking I really should get off my butt and do it!
That’s great, Jessica! I used this TSP Substitute that I picked up at Home Depot…http://www.homedepot.com/p/SAVOGRAN-1-qt-Liquid-TSP-Substitute-Cleaner-10632/205491255 I know it hasn’t been long, but so far it’s holding up great. I’ll update the post in a few months on how it’s doing. Feel free to email me if you have any questions, but I’m sure it will go great for you!
I just bought a stencil to do this exact same thing in my niece’s kitchen! I love how yours turned out, now I’m even more inspired!
Oh how cool, Roxanne! I hope it turns out well. Feel free to email me if you need anything, and I’d love to see it when you’re done! Thanks for checking it out!
This is seriously impressive and I’m jealous of how pretty this is! Oh and I cant believe you are such a bad mom . How dare you use his disposable paper plate! I’m calling CPS 😀
Well done my friend. ( on the bathroom that is. Not on scaring your child for life)
XO-Jenny
Simply gorgeous! Can’t wait to see the finale!
Wow! How fantastic!! You did a wonderful job! Visiting from Blog Fuel 🙂
What a wonderful idea, You did a fantastic job! I love the tuscany vibe.
Maria
Robin, This is so beautiful! I don’t think I would have the patience to do this, but I love it!
so gorgeous, amazing. Well done! you saved tons of money even for that small space cement tile would cost at least a few hundred, your right. 🙂
Such a great idea! I absolutely love it turned out. My son would have been horrified to use a paw patrol plate, too! Haha!
Wow, what a difference. That looks great. Thanks for the information on products and process.
I love that you painted those tiles! They look great! Also love the Paw Patrol paper plate! 🙂 My daughter would love that!
Wow, WoW, WOW!!! I love it! Thanks for the idea and for the great tips! Love it!
I’m so impressed! I had planned to stencil faux cement tiles for our master bathroom last time around, but then the plans changed so I didn’t end up trying it. I’m excited to see how well it worked for you!
Wow!! Robs, it looks amazing! Another job well done. That stencil on the floor tile is so beautiful! It makes me want to do that, but our tile won’t work with that. Hmmmm…maybe I could do something fun in the kids bath upstairs? 🙂