

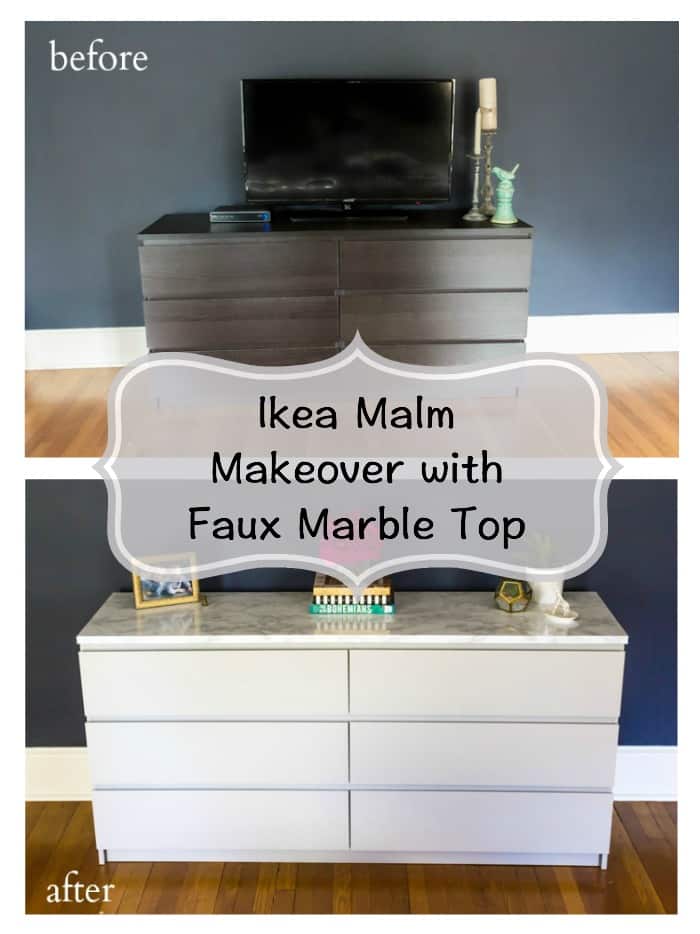
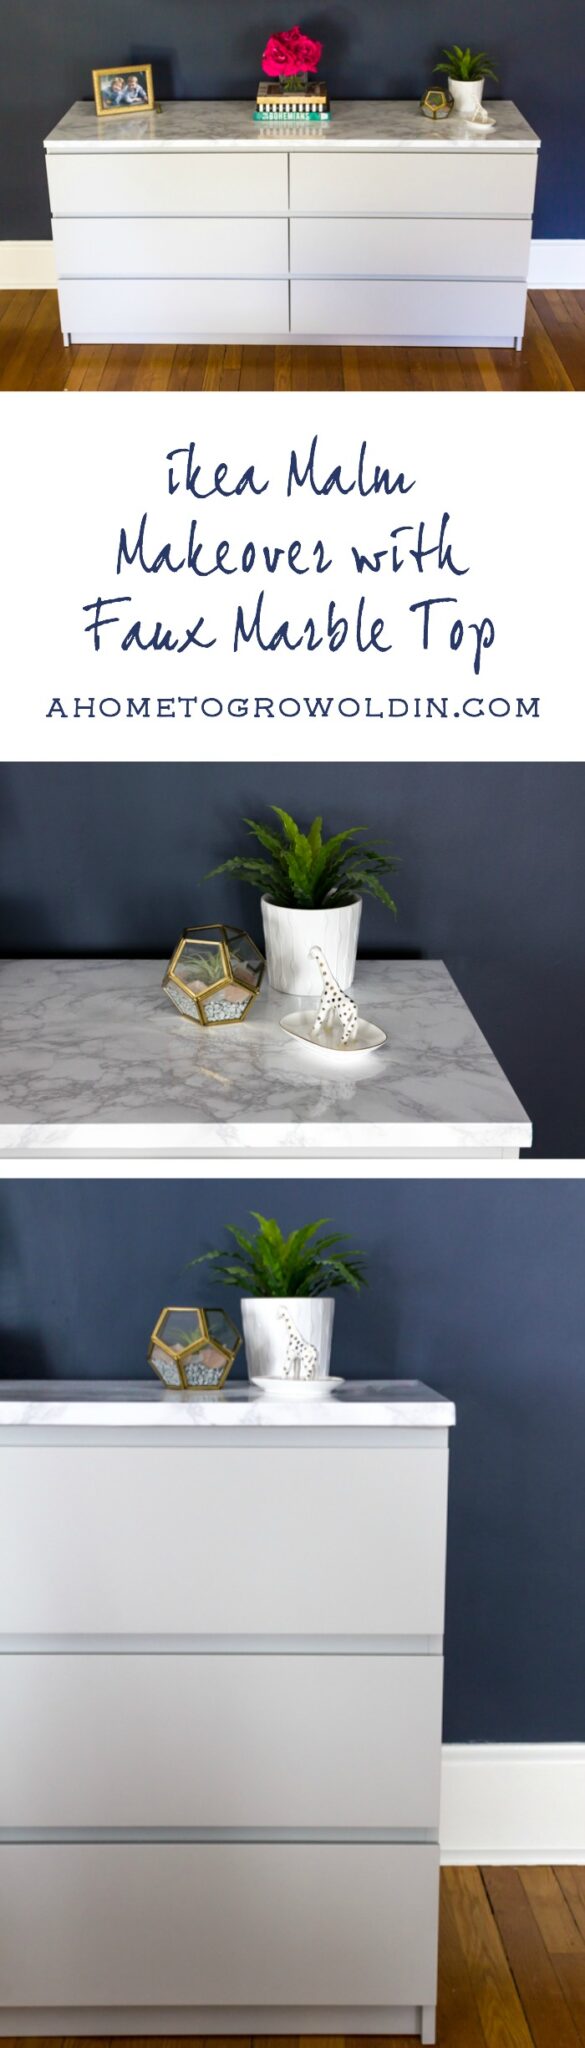
An easy Ikea malm makeover with tips on painting laminate furniture and how to apply a faux marble top. Check out the before and after pictures!
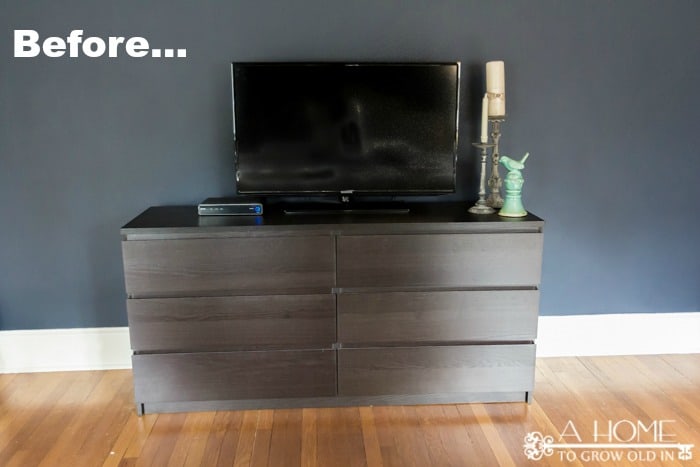
If you’ve been keeping up with our master bedroom makeover you know that I’ve been trying to lighten up the furniture to help balance the new dark walls. We have an old dresser that was still in good condition but was a dark espresso color that looked lost against the walls. You could barely see it, so I decided to do an Ikea Malm makeover with some paint and a new marble look for the top.
Can you paint laminate furniture?
There’s a common misconception out there that you can’t paint laminate furniture because the paint won’t stick and will just peel off, but that just isn’t true. I have an old mid-century modern desk that I painted, and it has a laminate top. It gets used and abused on a daily basis, and it has absolutely no wear on it whatsoever. If you do it right, you can update a laminate piece of furniture and have it for years to come.
How do you paint laminate furniture?
The key to painting laminate is making sure the surface is very clean and that you use a primer with excellent adhesion. Before I paint any furniture, regardless of what it’s made of, I clean it really well with a TSP substitute. Some time ago, I was painting a piece of furniture that started to bubble up for no apparent reason, and ever since then, I make sure to use a TSP substitute beforehand so there isn’t anything on the surface to keep the paint from sticking. The next thing I do is use at least two coats of a really good adhesion primer. My favorite primer is B-I-N from Zinsser. Not only do I love how well it makes the paint stick to the furniture, it dries AND cures in almost no time at all. That makes a project go super fast. It also lays really smooth, so you see almost no roller or brush marks, leaving you very little sanding in between coats, and also speeding up the process.
I typically use two coats of paint, and if the furniture gets a lot of use, I give it a couple of coats of polycrylic.
How to paint Ikea furniture
As far as painting goes, I have to say that the Ikea Malm dresser is one of the easiest pieces of furniture I’ve ever painted. Like with most Ikea furniture, the straight lines make it so that you could almost get away without using a brush and just use a roller on the entire thing. An Ikea Malm makeover is the perfect beginner painter piece to get started with if you’re new to painting furniture.
You may have noticed that I did not mention sanding the furniture before you start painting. One of the nice things about laminate is that you do not have to sand other than in between coats of primer or paint. Sanding the laminate can damage it, and the adhesion on with B-I-N primer is strong enough that you don’t need to do it anyway.
How to add a faux marble top to your Ikea dresser
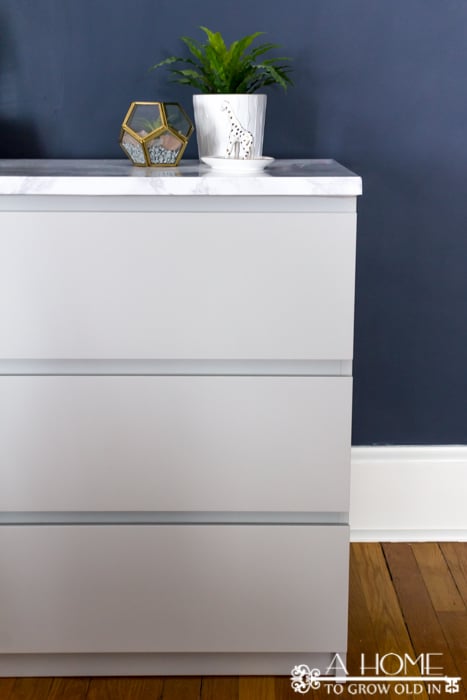
When I was working on the inspiration behind our master bedroom makeover I came across a picture of a gorgeous navy blue and gray kitchen with white Carrera marble countertops. I loved the combination of the three so much that it became the inspiration behind this dresser makeover. This was a simple update! I found this marble contact paper that is made for countertops. It is wider and thicker than most contact paper and worked perfectly for the top of the Ikea Malm dresser.
Here’s what you need for the marble top:
- marble contact paper
- straight edge (I used something like a credit card)
- scissors
- hair dryer
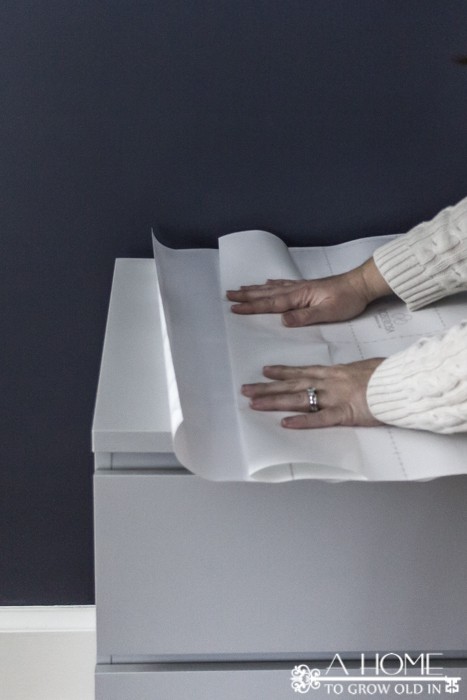
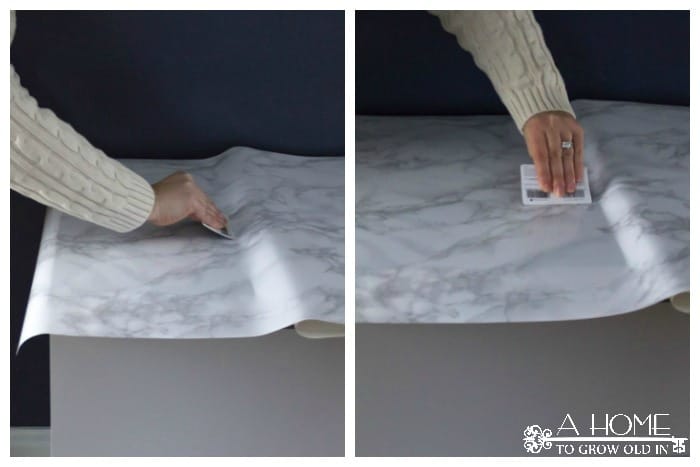
To apply, I initially turned the paper upside down and folded back a few inches of the backing. The fold made it easier to get started so the backing paper was not trying to curl back up and get in the way.
Once you’ve confirmed your email address, you will receive our weekly newsletter full of our latest posts, as well as content that is exclusive for A Home To Grow Old In subscribers. Plus, you’ll have access to our Resource Library that is full of FREE printables and SVG cut files.
Then, I turned the paper back over so that the marble side was facing up. I let the sticky side make contact with the dresser, leaving a couple of inches overhanging at the end. I pulled the backing paper back about 9″ from underneath.
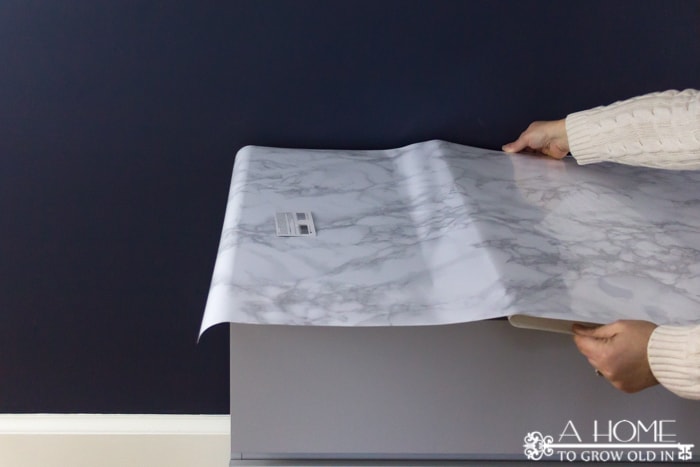
I pushed out any air bubbles using a thick card and repeated the process of pulling back the backing until I got to the end.
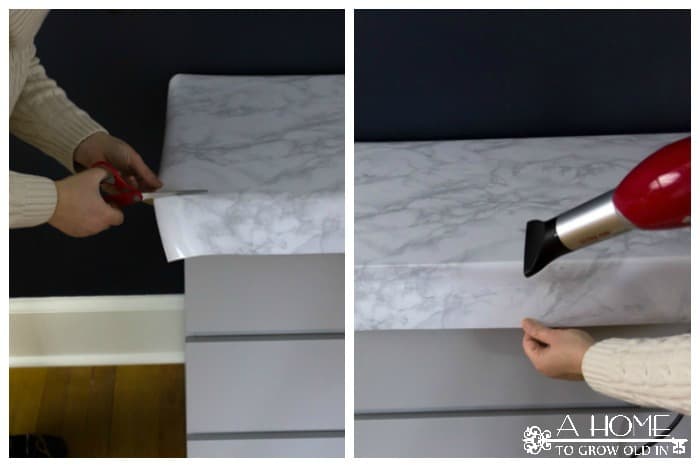
I cut off any excess once I got to the end. I did not trim it to length before I started because I used the weight of the excess roll to keep the paper from rolling back up while I worked.

To get nice square corners, I made a cut in the paper as close to the dresser as I could get. Then I folded one end in and placed the other flap on top of it, similar to wrapping a package.
I warmed the contact paper up with my hair dryer to help get nice, sharp edges. This contact paper is really thick, and warming it up made it more pliable and helped it crease a little easier.
I was expecting to have a lot of trouble with air bubbles, but it really wasn’t much of a problem. The bubbles that did form were along the sides, and I think I could have avoided them if I had gone back over the top of the dresser, near the edge, with a credit card before I folded the contact paper over the edge. Even then, the bubbles were still fairly easy to push out.
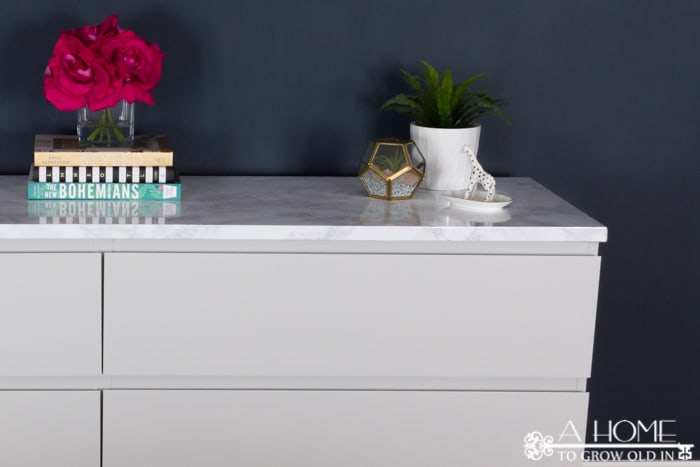
Lastly, I trimmed off any excess from the edges, and I was done.
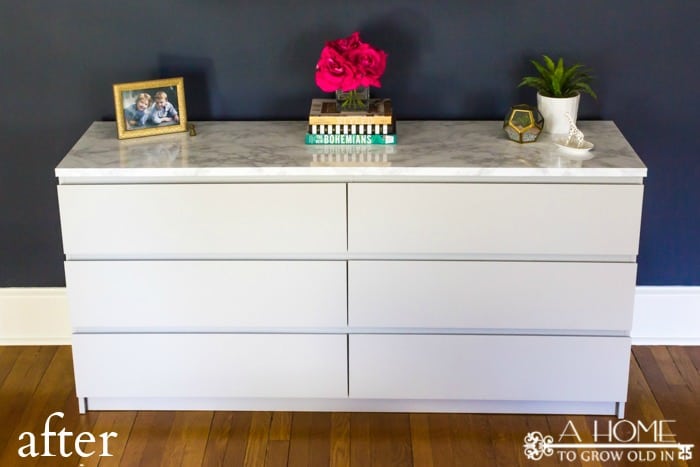
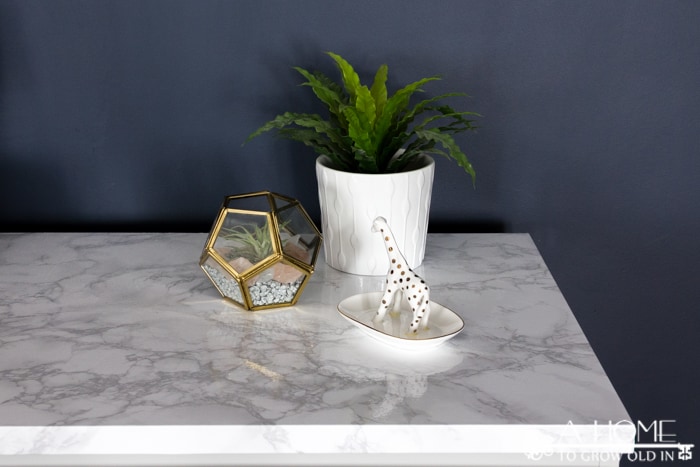
I am so happy with how this piece of furniture turned out! This makeover was surprisingly fast and easy. I painted it over the course of 2 days, and the top took maybe 45 minutes at the most. It looks like a completely different piece of furniture. I love how it looks against the navy walls and doesn’t feel as big and heavy as it did before.
What do you think of the makeover? I’m still considering adding some drawer pulls. Do you think that would be too much?
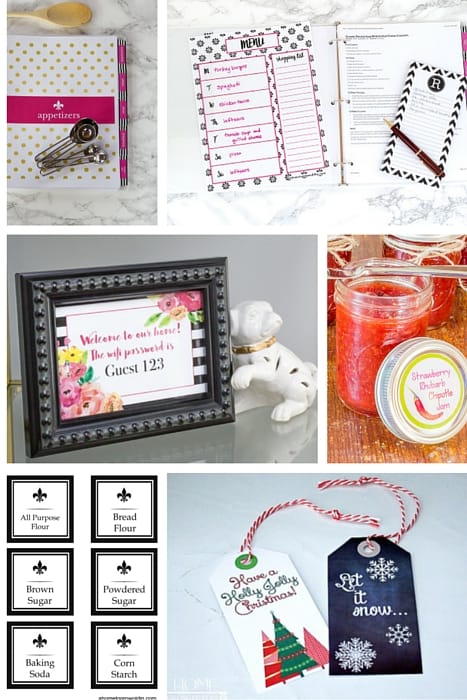
If you like my Ikea Malm makeover, I’d love to stay in touch! Sign up to receive my emails below. Email subscribers have exclusive access to my printables library that I’m adding to all the time. Check out a few of the printables available below. Or, if you’d prefer, I’d love to also connect on social media. Those buttons are on the top right-hand side of the page! You may also want to check out a few of my most popular posts while you’re here…my oversized checkerboard (which is great for outdoor fun!), my bedroom vanity makeover, or this fun recipe binder that has made my meal planning so much easier! Hope to see you again!!!
Updated March 2020.


Very cool- I’m so inspired to do this to SO many pieces!!!!
Thanks, Gina! It’s a fun and inexpensive way to update so many things!
Nice makeover idea, too bad they’ve recalled all the Malm dressers , sent both of mine back for full refund from IKEA….looking for vintage now 🙁
Wow, what a transformation! I just bought a roll of this marble adhesive for a food photography backdrop, but I should use some of it for something like this. I just love how it turned out!
Uh oh, Jenna! Watch out! I bought a roll to use as a backdrop. Now I’m on my second roll, and I can’t stop covering things with it! I have a problem, and I need help! (Admitting it is the first step in recovery, right?) Glad you like it! Thanks for stopping by!
Love how this turned out! Thanks so much for sharing with us at Brag About It!
Pinned to share.
I LOVE the new look! I bought some marble contact paper a while back for a similar project and have yet to try it. But now I know I need to get moving on it! Thank you so much for linking up to our Pretty Project Party this month 🙂
Thanks, Sarah! I had a lot of fun working with the contact paper, because instead of all of the time and effort I usually spend when redoing furniture, I was able to see a major transformation in minutes.
Fabulous job! I would use sleek, silver bar pulls…
Definitely using your idea with the marble contact paper!
Thanks, Nanette! I’ve been using marble contact paper on so many things lately. I just finished using it to line a wooden tray that I keep by my coffee station, and I love how it turned out. Just make sure to check the width of your project versus the width of the roll, because they definitely come in different sizes. Good luck marble-izing!
Love the project ! And where did that cute giraffe dish come from?
Thanks so much, Star! Isn’t that giraffe dish the cutest? It came from Michael’s. My husband took our sons there last Christmas to pick out a gift for me, and this is what my youngest picked out. It’s really special to me! So glad you took the time to check it out!
Gorgeous! Can you explain how you handle the corners?
Never mind – I missed that part!!!
This is great ! What color did you paint the actual dressers ?
Wow, Fabolous! Doesn’t the Malm come in white, can I just purchase it in white and do the marble finish??
Hi, Alexa! You definitely don’t have to paint it if you can find one in white. We painted ours because we were working with what we already had, and it was dark and needed an update. You could also do it with any type of furniture, but I think it would work best on something with straight edges. This contact paper even works great on glass coffee tables. Feel free to email me if you need any help with anything!
I love this post! I have two malms I’ll be painting, thanks to confidence from your post. I have a few questions!
Do you sand the entire piece in between primer and paint? Or only rough patches?
What type of roller sleeve do you recommend for a streak free application?
And most importantly, what color and brand of paint did you use? LOVE IT! I just painted our bedroom a very deep grey.
❤️H
Hi, Hannah! I’m thrilled to hear you like it! This was a really easy piece of furniture to paint because of all the straight lines. You’ll be done in no time. I did a really light all over sanding in between every coat of primer/paint. Having a really good primer is so important when you paint laminate furniture or your paint will chip. I really love B-I-N primer, and it sands very smooth after less than an hour drying time. Just make sure to vacuum it off and wipe it with a tack cloth after sanding so nothing keeps the paint from sticking. I use Wooster mini rollers in the shortest nap they have (I believe it’s 1/4″ for smooth surfaces). I love Sherwin Williams Proclassic paint (I used Light French Gray for this project). It’s a little more expensive, but I think it goes on so much better than anything else I tried. When Sherwin Williams has a sale I usually pick up several quarts or gallons but don’t have them put any color in it and save it for later. Then, when I need paint, I bring the untinted paint back to the store and they will add the pigment for free. I painted our Malm over a year ago, and it’s held up beautifully! I know this is a lot of information, so feel free to email me if you have any other questions. I’d love to see pictures when you’re done! You may also want to check out my post on some of my favorite paint supplies. Good luck! http://ahometogrowoldin.com/2016/10/21/favorite-paint-supplies/
OMg! I love your make-over! I am looking to makeover my MALM 2 drawer dresser and don’t have a lot of space to do big projects. This is such a easy & great way to do it! Did you just use 1 coat of the BIN primer and then 2 coats of paint? What kind of paint did you use/recommend?
Hi Robin!
The link you posted for the marble contact paper ia for the one 24″ wide but the dresser is 30″ wide. Is this the same product you used? And maybe they listed the width of the paper wrong?
Hi, Vicki! I used this on a 6 drawer Ikea Malm dresser, which is about 19″ deep by about 63″ long, so the 24″ inch paper worked great for me once I trimmed a little off the width. The roll of contact paper is long enough to cover the length of the dresser as well. Are you trying cover the same kind of dresser? I believe the same pattern of contact paper is available in 48″ wide if you need something wider.
This is absolutely beautiful! Im gonna do this to a large laminate desk in my son’s room… we’re updating his whole room to have a more modern feel. Did you paint the top of the desk before you put the contact paper on?
Hi, Heather! I used a couple coats of primer on the top because I was worried that the dark wood would show through the marble contact paper. I’m not sure if it was necessary because the contact paper is pretty thick, but I would rather be safe than sorry. It’s been well over a year since I completed this, and it’s holding up fantastic. Thanks so much for letting me know that you like it!
Love this. Just wondering what type of paint you used after u primed it.
Thanks 😉
Thanks, Nicole! I am a big fan of Sherwin Williams Proclassic for furniture. It levels out very smoothly so you don’t see much of the brush strokes or roller marks. The downside is that it’s expensive, so I stock up when it’s on sale. They will let you buy it untinted, and then you can bring it back when you’re ready to use it to have them put the color in.
Hi! I was wondering what your thoughts are on spray painting for this kind of project? Or is hand rolling the better option for quality? Thank you!
Hi, Tran! I think the big key to doing this kind of project is a really good primer as a base coat. Spray paint should hold up well if you used an adhesion primer first. I’m going to do an update on this dresser soon, but it’s been almost 2 years with daily use, and it’s holding up great. Thanks for checking it out!
Hi Robin, this is a wonderful transformation ! Can you tell me how the contact paper has held up? Does the adhesive around the edges start coming off? And how do you suggest I avoid that on a project I’m undertaking for our nightstands. Thanks a ton!
Hi Bernadine! The contact paper has held up wonderfully! It’s been almost 2 years, and it hasn’t started peeling up at all. The contact paper I used isn’t like your typical contact paper. It’s much thicker and more heavy duty since it’s made to cover kitchen countertops. My biggest advice is to make sure you have a really clean surface before you try to adhere the contact paper. I really like using a TSP substitute that you can pick up in the paint section of any hardware store. You may also want to rub it down with some rubbing alcohol as an extra precaution. Good luck and let me know how it turns out!
I’m searching for a source of the 48″ faux marble. My countertops are 25″ wide and 24″ would make me patch it.
Hi, I am wondering if a mistake was made, or if needed, can the contact paper be peeled off, or would it wreck the surface?
Also, I am hesitant about the corners, could you post a close up? Can you see the fold?
How much paint and primer did you use? I am plannig on doing the same with the same malm dresser but am unsure how much of paint and primer to buy.
Thanks! Looks awesome
Hi, Ilana! I did this project a couple of years ago, but I don’t believe I used more than a quart of paint and primer. I’m a big fan of Sherwin Williams Pro Classic paint and BIN primer. They are a little more expensive, but they go on so smooth. Also, Sherwin Williams has sales all the time if you watch for them. It has also held up exceptionally well over the last couple of years. Good luck with your project and let me know how it goes!
I use one like that to put my makeup on, do you think its easy to clean if spill something