Easy instructions for an oversized outdoor checkerboard game that is perfect for some backyard fun and entertainment this summer! Both kids and adults will love it!
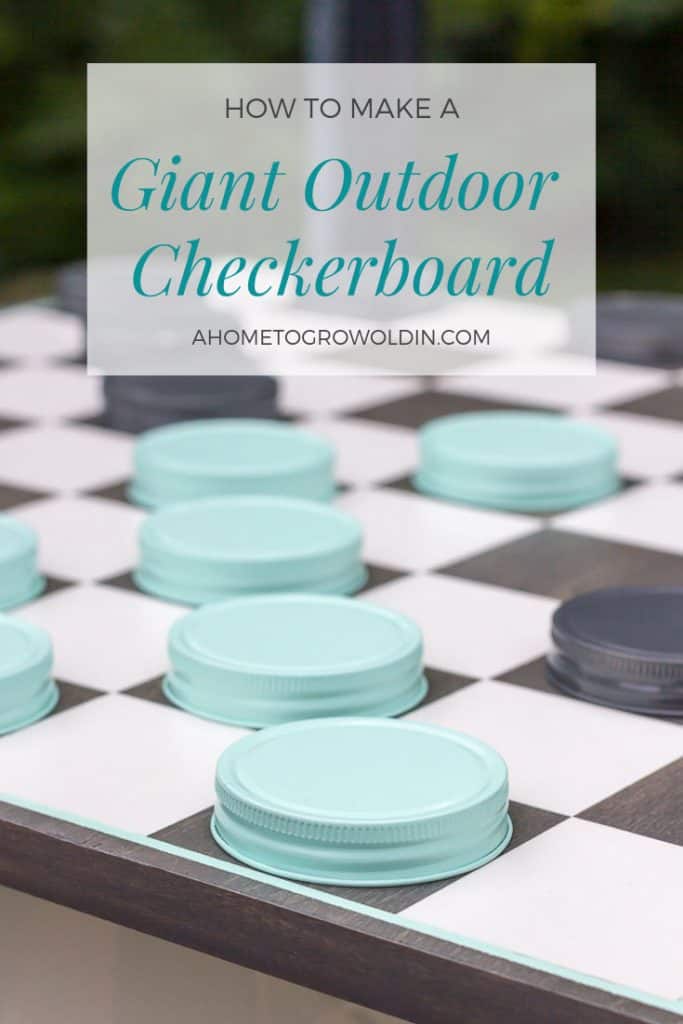
Hi there! Hope you’re having a great 4th of July! Do you have big barbecue plans, or are you just taking it easy at home? We are doing a little of both. We went to a big party yesterday and watched an amazing fireworks display, but for the actual 4th we are just hanging out at home, grilling, and having some family time. I thought I’d pop in to show you how I made one of our new outdoor games, this oversized checkerboard, that we will definitely be playing today.
We spend quite a bit of time outside and have recently been adding to our outdoor game collection. So far, we’ve built this giant connect four game, and now we’ve added this oversized outdoor checkers game. There’s something about playing a gargantuan sized game that makes it so much more fun than playing the same game in a normal size!
Here’s What You Need For Your Outdoor Checkerboard :
This post contains some affiliate links for your convenience (which means if you make a purchase after clicking a link I will earn a small commission but it won’t cost you a penny more)! Click here to read our full disclosure policy.
- plywood cut to 24 x 24 inches (I used poplar in 23/32″ thickness)
- painters tape (I prefer Frog Tape)
- X-Acto knife
- framing edge
- wood veneer edging
- veneer edge trimmer
- primer
- paint & stain
- polycrylic
- 24 mason jar lids
How To Make An Oversized Outdoor Checkerboard Game
1. Make Your Game Pieces
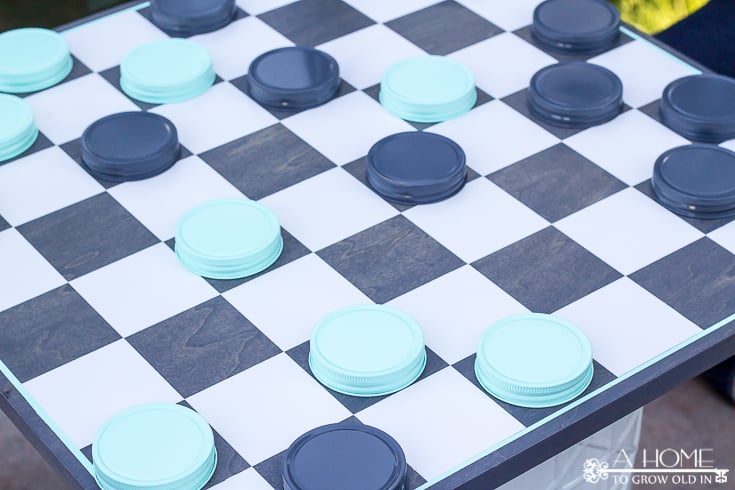
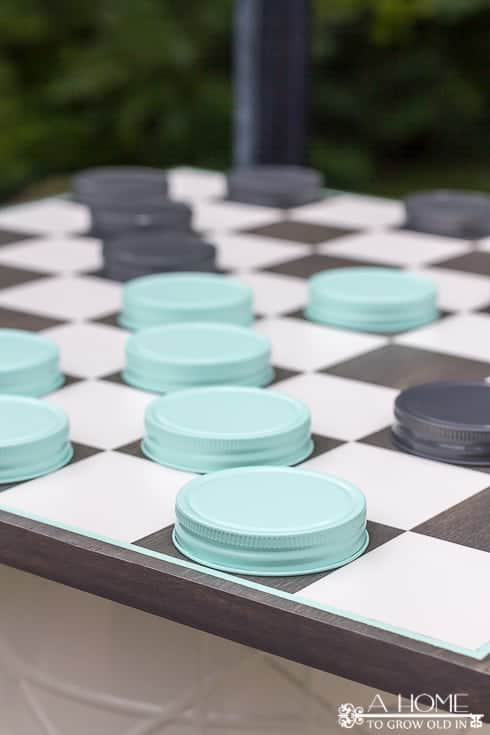
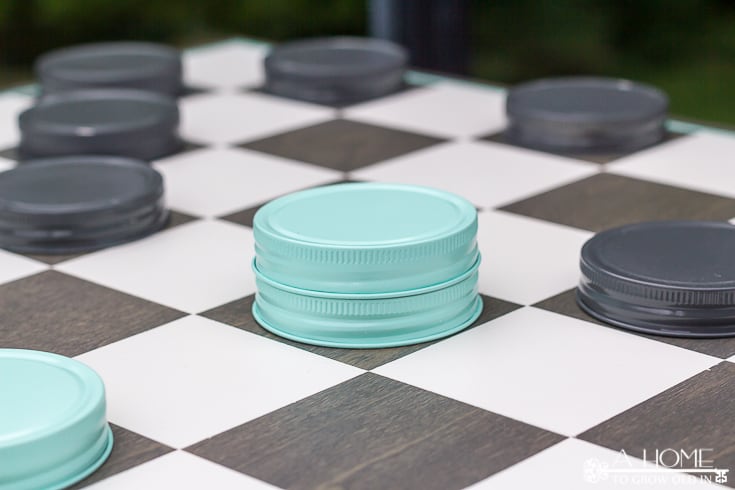
To start, I spray painted 12 of the jar lids Rust-oleum’s Ocean Mist and the other 12 lids Dark Gray. It’s a good idea to clean the lids with a TSP substitute prior to painting them. If they’re new, there can be some sort of residue from the manufacturer and the same if you’ve used them for food storage. Any residue can keep the paint from sticking to the lids. Once I painted them, I allowed them to dry and set them aside. These will be your game pieces.
2. Make The Base For Your Game Board
One of the things that made me really happy about making this was that I was able to use a lot of materials that I already had on hand. The plywood was a scrap from another project. If you don’t have a scrap, most of the big hardware stores sell smaller pieces, and they can also cut to size in the store if you ask (this makes this project super easy). I always have tons of different colors of spray paint laying around. Same with painters tape and polycrylic. Something that was new to me, though, was using wood veneer edging. It was so easy to use and makes cheap plywood look like expensive wood.
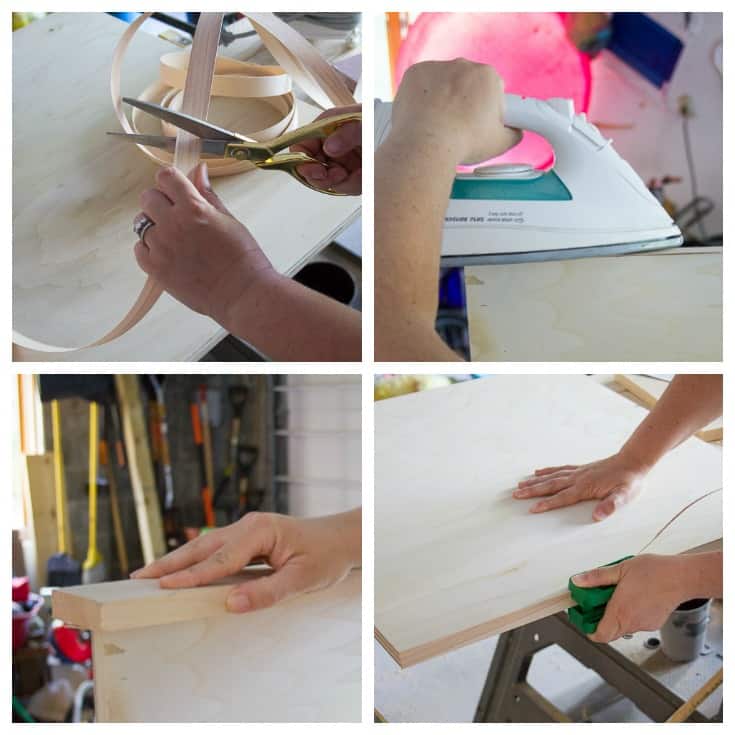
I cut the edging to length with scissors. The back of the veneer has adhesive but needs heat, so I ironed it on to the edge of the plywood with an iron set on the cotton setting. Once the adhesive had adhered to the plywood, I used a piece of wood to keep the veneer flat while it cooled off. To trim off an overhanging veneer, you simply press the edge trimmer against the edge of the plywood and squeeze while running it along each side. If the trimmer leaves a little of the veneer overhanging, don’t worry, it sands down very easily.
3. Stain Your Wood Base
I really liked the idea of seeing some of the wood grain on the board, so I decided to stain it before painting on the squares. The stain was made up of 3 parts Minwax Classic Gray and 1 part Dark Walnut. Classic Gray has a lot of blue in it, but adding a little Dark Walnut makes it less noticeable. I then let the stain dry overnight before I began painting it.
4. Tape Off Your Board
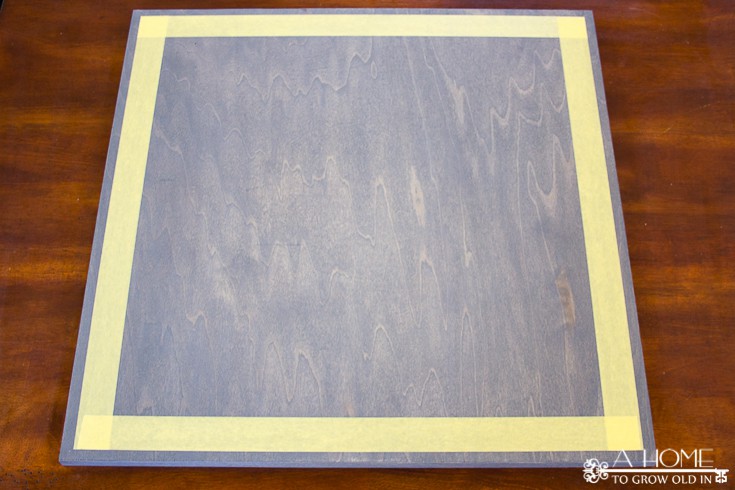
To create the checkerboard squares, I started by taping off a square with a .5″ border around the board.
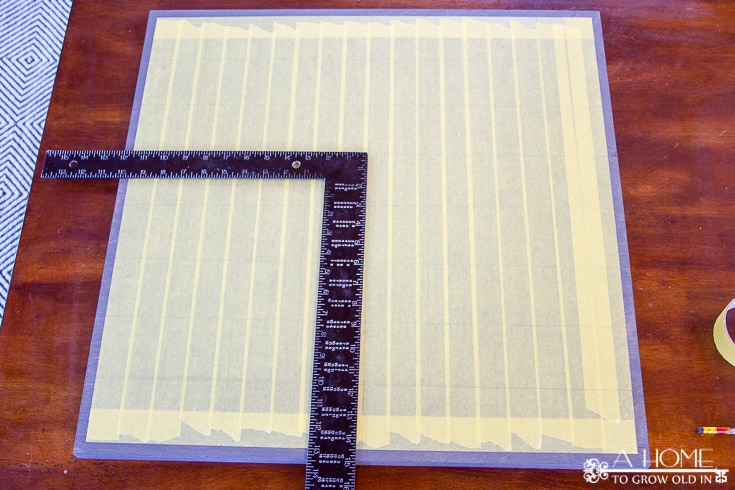
Then, I filled in the entire square with strips of painters tape. Figuring out the size of the checkerboard squares was a little tricky because I had to pull out some of my very weak math skills and my college math major husband was out of town, actually of the country, so calling him wasn’t even an option. I’m kind of proud that I figured this one out. Hopefully, this will now be a piece of cake for you.
5. Measure and Mark Your Squares
My wood was 24 x 24 inches and a checkerboard is 8 squares across. I wanted to leave a .5″ border around all the edges, so I divided 23 inches by 8 to get 2 7/8 inches for the size of the squares. I used the framing edge as a ruler to mark every 2 7/8 inch on each side of the plywood square. An easy way for me to do my measurements was to remember that 2 7/8 is one little line on the ruler less than 3 inches, so for each line, I would measure 3 inches from my last mark and move back one little line.
Then, I used the straight edge to help me draw the lines with a pencil connecting the marks on each side of the board. Once all the lines were drawn, I used the framing edge to help make sure all my squares were truly square before I started cutting. Luckily, I got my measurements right on the first try! If you’re not square, simply erase your lines and start your measurements over.
6. Cut Out Your Checkerboard Squares
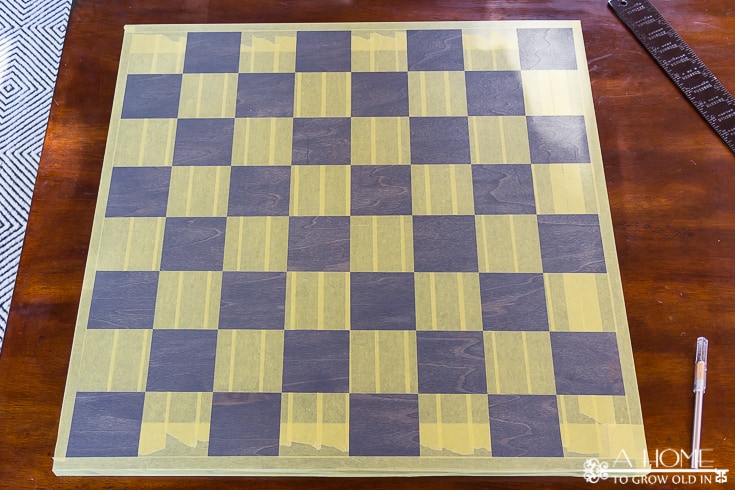
Next, I used the framing edge as a guide to help cut all the lines I had marked with the X-Acto knife. It takes a few cuts to figure out how deep to go but be careful to only cut into the tape and not the wood. It’s easier than you think, and it only took me a few minutes to cut all of the lines.
I then removed the tape from every other square and taped off the edge on each side so that I wouldn’t get paint on it. I made sure to press down on all of the edges of each of the squares so that the tape was sealed really well to the board and paint wouldn’t get under it.
Once you’ve confirmed your email address, you will receive our weekly newsletter full of our latest posts, as well as content that is exclusive for A Home To Grow Old In subscribers. Plus, you’ll have access to our Resource Library that is full of FREE printables and SVG cut files.
7. Paint Your Checkerboard
I’ve never painted over unfinished stain before, and I really couldn’t find any information on the proper way to do it. I decided to paint over the board with a single coat of oil-based primer before I painted the board. I’m not really sure if that’s necessary but since I used an oil-based stain I went with an oil-based primer. You could probably use a paint with primer in it and skip that step. Once the primer dried, I used 2 coats of a white paint that I had leftover from another project.
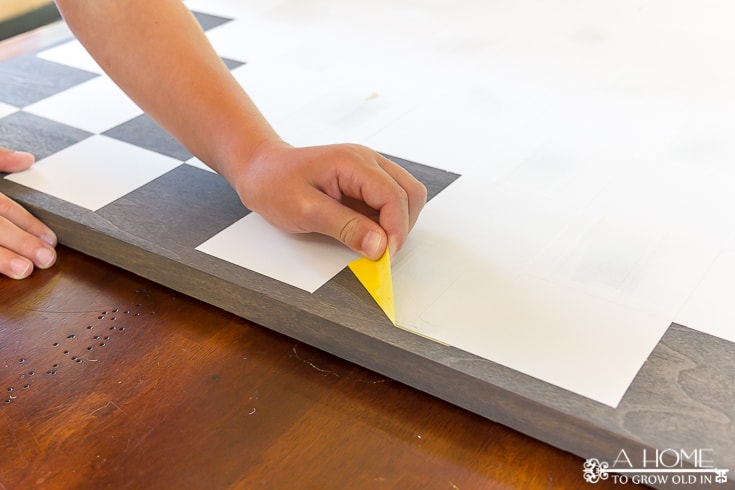
Here comes the fun, but scary part…pulling off the rest of your tape. I did a little prayer here that my tape really worked, and that my paint didn’t bleed under it and onto the stained squares. This is why I love Frog Tape (this is in no way a sponsored post), no bleeding whatsoever!!! All the edges came off super clean! My 6 year old loved this part. He was so excited to help me pull off all the tape.
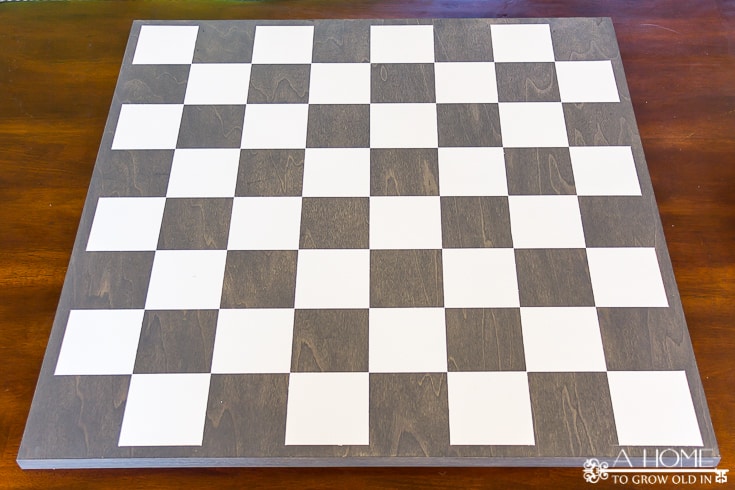
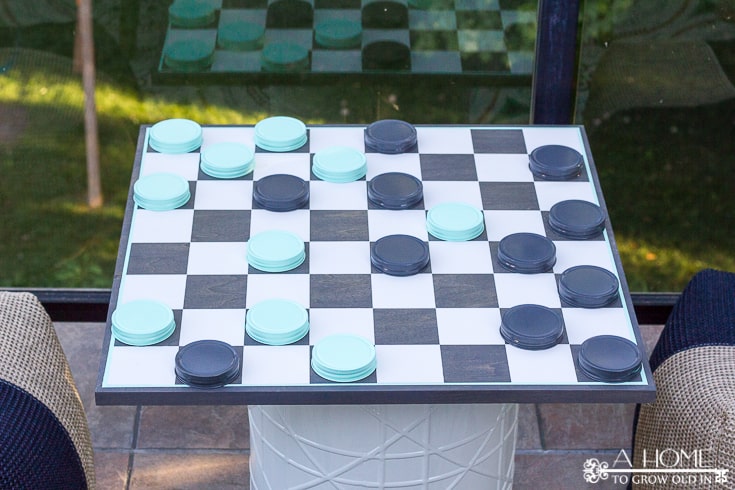
Here’s what the checkerboard looked like once all the tape was off…
8. Add A Little Color To The Checkerboard
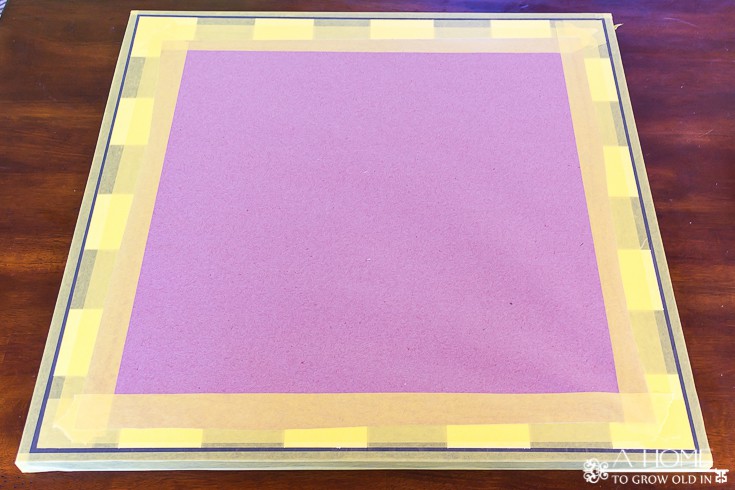
The checkerboard looked pretty great, and we definitely could have left it like this, but my son thought it would look really nice with a mint colored (that was one of the colors we used on the game pieces) line around the board. I love him! I thought that was a fantastic idea, so I started taping off the board again.
This time I didn’t do any measuring. I just eye-balled a thin line around the edge of the checkerboard. Then, I covered the center of the board with some craft paper since I was painting with spray paint. I love that the line around the board ties in the color of the game pieces!
9. Seal Your Checkerboard
The last thing I did was spray all of the sides of the checkerboard with 3 coats of polycrylic so that I didn’t have to worry about cleaning anything else up. The spray poly dries really fast, and we started playing the next day.
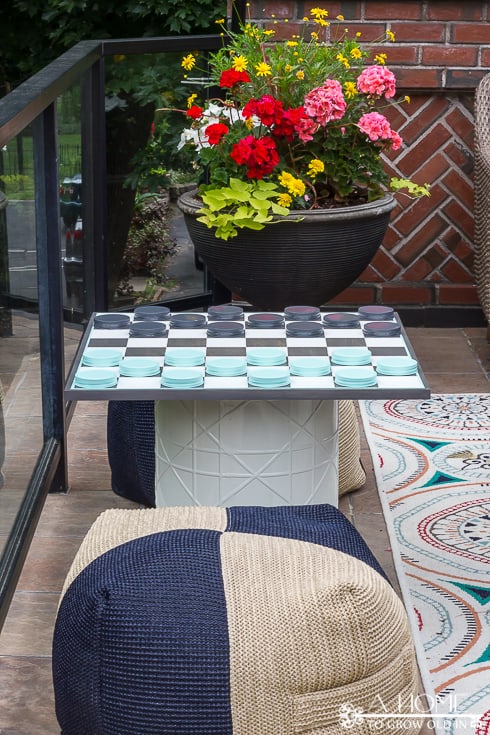
Take Your Oversized Checkerboard Outdoors To Start Playing
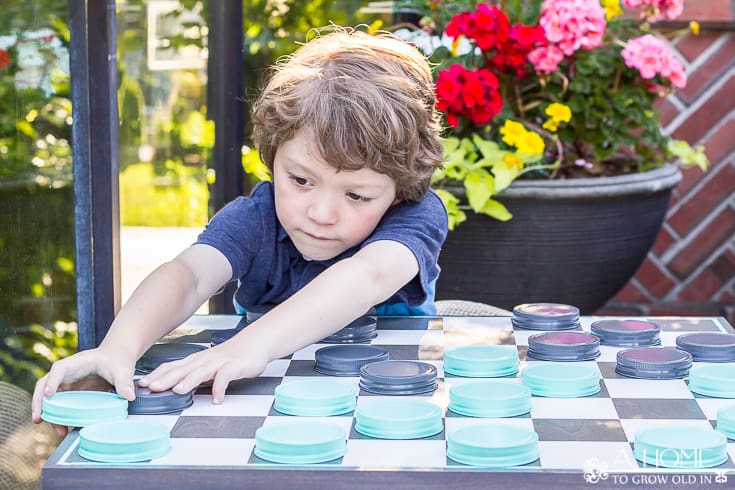
The game looks huge compared to my son!
Big bro really loved showing his little brother how to play checkers! He’s so proud of how much he helped me with this project, and it’s been really cute seeing both of my boys play it together.
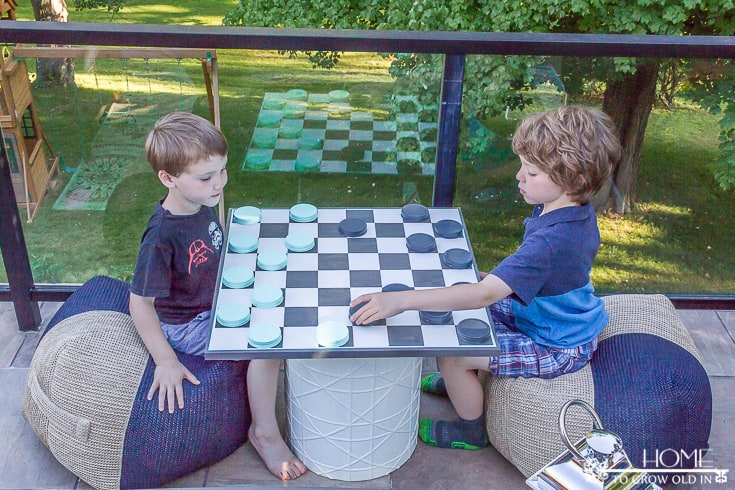
Crown me! The lids can be stacked!
This project was a great way for us to use up some of the extra materials we already had around the house. And, I love having another outdoor game to help us enjoy our family time together!
How To Maintain Your Outdoor Checkerboard Game
The checkerboard does not have any sort of outdoor protection or sealant, so we bring our game indoors when we aren’t using it. We’ve stored our game in the garage for a few years now with no problems, but it definitely wouldn’t hold up to rain. The game pieces fit into a large ziploc bag.
More Outdoor Games
I mentioned that we recently made a gigantic connect four game, but there are so many more DIY outdoor games out there. This article has a ton of incredible games that are easy to throw together and play in the backyard.
Don’t Forget To Save This Outdoor Checkerboard Game Tutorial For Later!
Do you think this outdoor checkerboard is something you’ll want to make some day? If so, pin it so you don’t forget it!
Looking for more outdoor inspiration? Check out a few more ideas while you are here!
- Tasseled Outdoor Umbrella Makeover
- How to Age Galvanized Metal to Make Herb Planters
- Patriotic Table Makeover
How to Make an Oversized Outdoor Checkerboard
Easy instructions for an oversized outdoor checkerboard game that is perfect for some backyard fun and entertainment this summer! Both kids and adults will love it!
Materials
Instructions
- Make your game pieces using the mason jar lids.
- Make the base for your game board.
- Stain your wood base.
- Tape off your board to prepare for painting.
- Measure and mark your squares.
- Cut out your checkerboard squares from the tape.
- Paint your checkerboard.
- Seal your checkerboard.
If you like this post, I’d love to stay in touch! You can sign up to receive my emails here. Email subscribers have exclusive access to my printables library that I’m adding to all the time. Check it out a few of the printables available below. Or, if you’d prefer, I’d love to also connect on social media. Those buttons are on the top right-hand side of the page! Hope to see you again!!!
Originally posted July 2016. Updated April 2019.


Robin….you are amazing. Now you will have to figure out how to make a chess set!!!
Thanks! I already have some ideas on chess pieces!
This is so very cool! Love the jar lids~! Thanks for linking up to Merry Monday! Pinned & Sharing on FB! Have a great week!
Kim
Hi, Kim! Thanks so much for stopping by and sharing!
I love the checkers table. It really turned out great.
A nice idea for getting the kids away from their iPads!
I love this project! The aqua color is gorgeous! Thanks for sharing!
This is really awesome!! My kids love to play checkers. What did u set the checker board on to play?
This is an awesome project! Love the colors you used too. Thanks for sharing with us at Brag About It! Pinned to share 🙂
Thank you for stopping by and sharing, Laurie! I always love joining in at Brag About It!
How fun! I love the pretty Tiffany blue ~ and mason jar lids!
Thank you for sharing this week at Brag About It link party on VMG206 (Mondays at Midnight). I plan to feature you next week!
~ Megin of VMG206
Hi, Megin! Wow! Thanks so much! I’ll make sure to stop back by Tuesday!
I am pretty sure I have everything I need to make one of these! My kids would love it, and it would be less likely they would loose the pieces (that is what happened to the tiny checkers pieces we once had). Thanks so much for sharing at the Wednesday Showcase party. Pinned!
Having almost everything on hand already is one of the things I loved about this project. It was nice not to spend a lot of money on making something. Let me know how it turns out! Thanks for stopping by, Kati!
That is a beautiful checkerboard! Love the idea of using lids for the pieces! Brilliant!
Thanks so much, Doreen!
I just made this! I’m going to spray paint the other side with Chalk board paint so if we flip it, we can play tic tac toe or hangman!