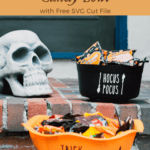

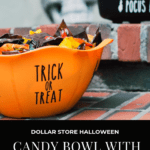
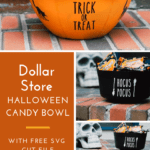
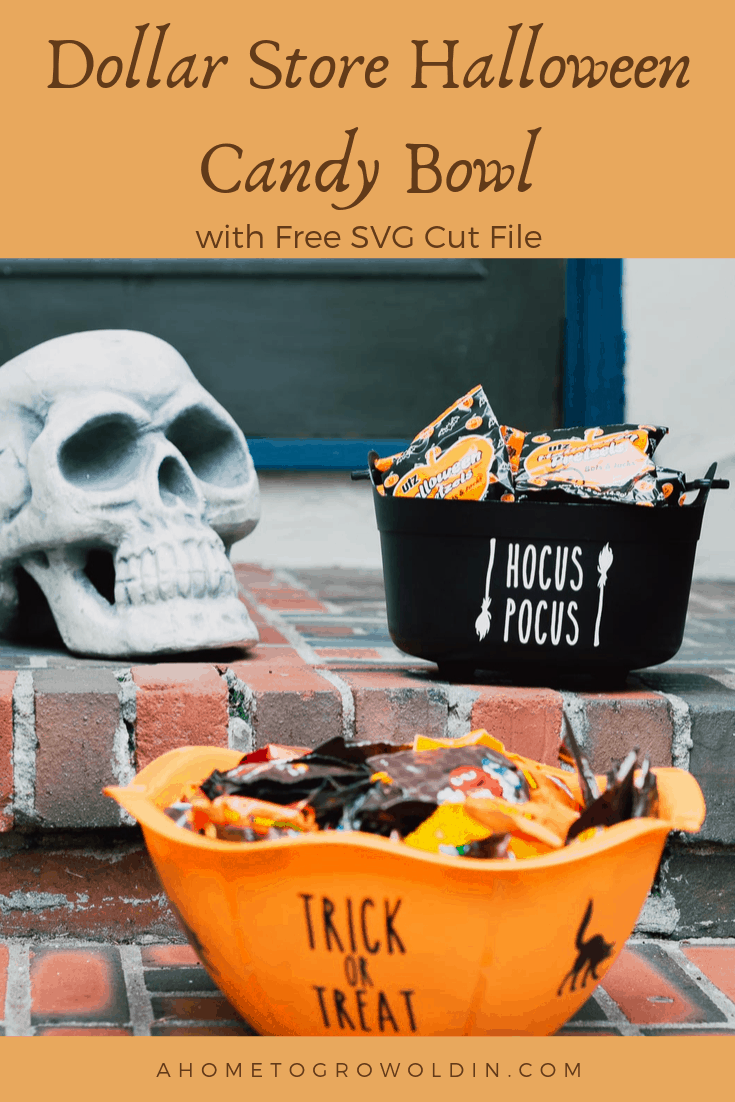
A cheap and easy way to make a Rae Dunn Inspired Dollar Store Halloween Candy Bowl with a free SVG file that makes a great place to hold all your trick or treat candy.
This post contains some affiliate links for your convenience (which means if you make a purchase after clicking a link I will earn a small commission but it won’t cost you a penny more)! Click here to read our full disclosure policy.
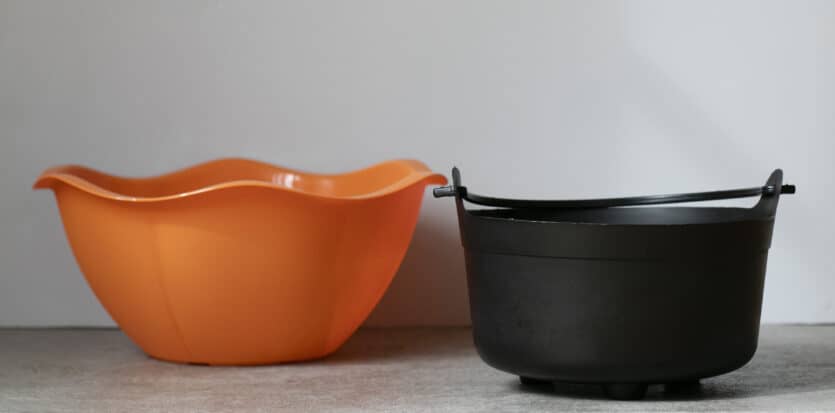
Our neighborhood has a lot of trick or treaters, so I really need to stock up on candy. Leading up to Halloween, I take advantage of any Halloween candy sale I see. I love deals and saving money, which is why I enjoy a creative Dollar Store find. This DIY Dollar Store Halloween Candy Bowl is an inexpensive and fun way to hold all your candy.
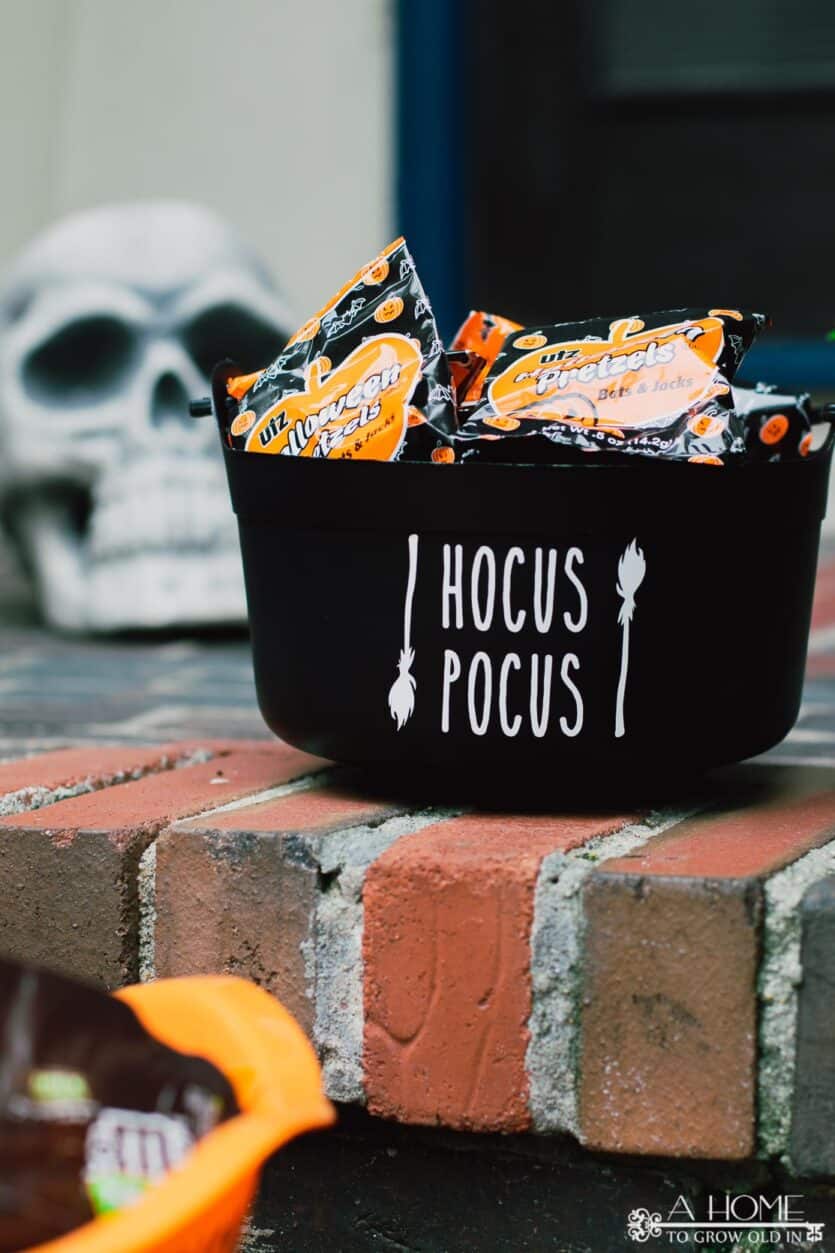
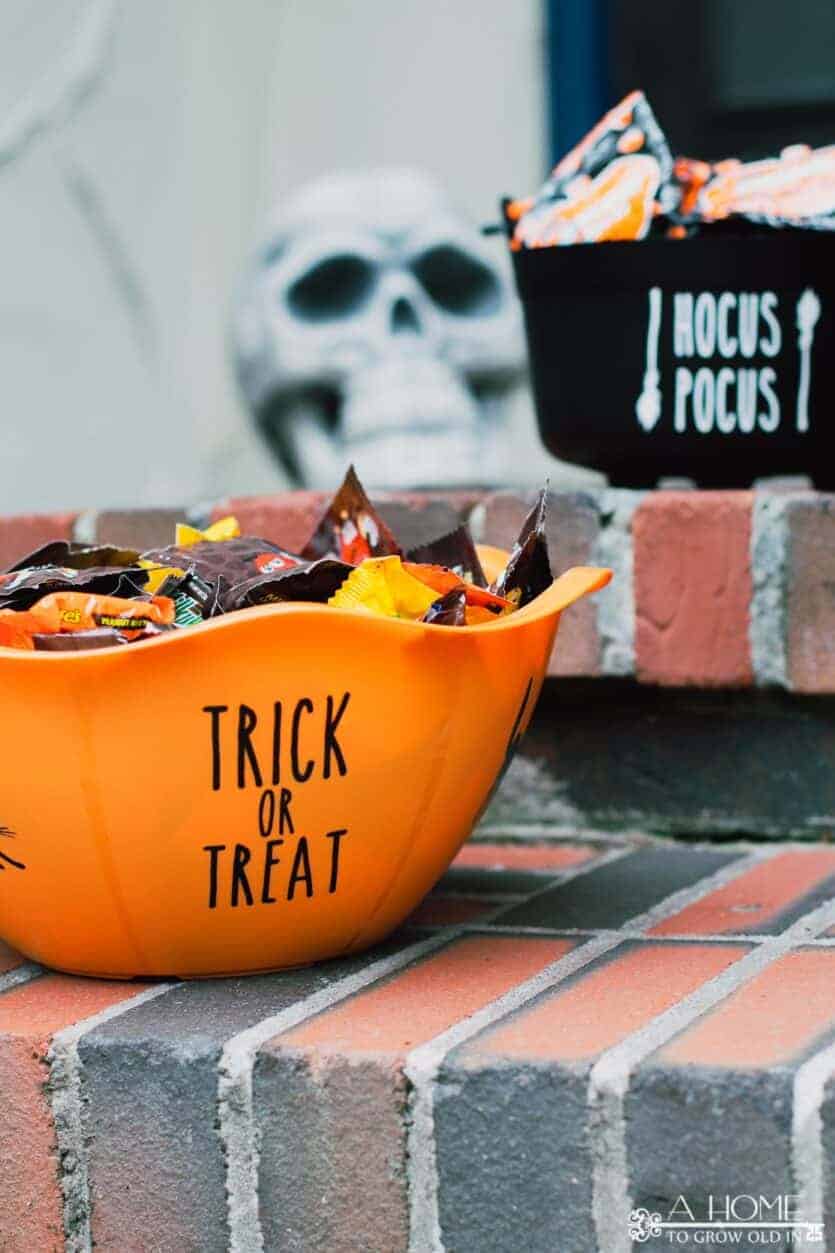
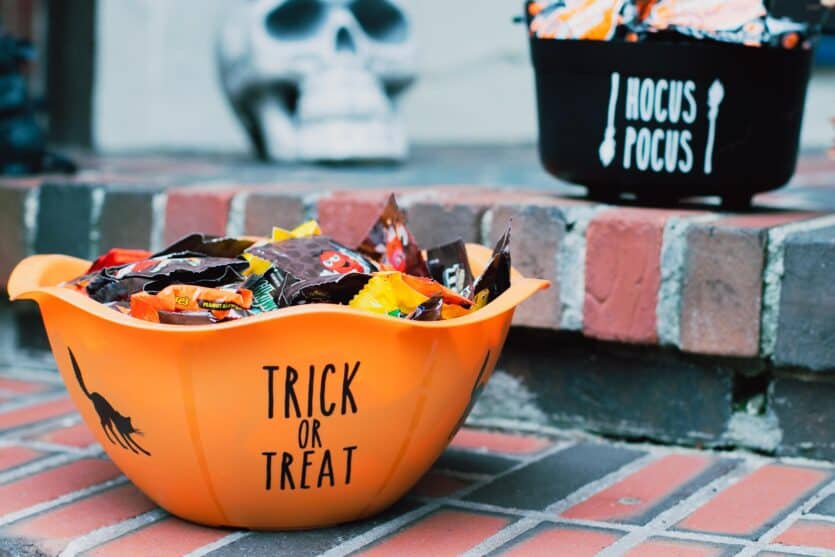
While at the Dollar Store, I got the inspiration to make two different Halloween candy bowls. With the amount of candy I buy, I know I can easily fill them both up. However, you can totally use one of the candy bowls to hold another snack for the kids, such as Halloween pumpkin and bat shaped pretzels.
WHY DO WE GIVE OUT CANDY ON HALLOWEEN?
As a child, I didn’t question why one day a year I could walk around my neighborhood and collect a whole bunch of candy. I looked forward to putting on my Halloween costume (most likely a homemade one by my mom) and going trick or treating.
Apparently handing out candy on Halloween came about for a few reasons that included parents and large candy companies. On the constant hunt to make more money, the candy industry thought it would be a great idea to create a holiday in October that involved sweets. Therefore, after the turn of the century, Candy Day was started.
Then, by the 1940s, parents were looking for ways to keep their active children out of trouble (or tricks) and organized the activity of trick or treating on Halloween. The candy corporations jumped on this as a way to sell more candy. Thereby creating Halloween, a day to hand out candy and one that kids still love to this day (obviously).
WHAT CAN YOU HAND OUT INSTEAD OF CANDY ON HALLOWEEN?
Maybe you are looking for a healthy alternative to all this candy or you have an allergy, well there are definitely a lot of other options out there. Let’s face it, we know sugar is not the best for our bodies, especially our teeth, and the healthy alternatives have increased in recent years.
If you want to stick to handing out a food item for trick or treating, pretzels, goldfish, and raisins are nice alternatives to candy and work for those with peanut allergies.
Aside from food, there seems to be quite a variety of options to choose from that are a perfect food alternative. You may want to consider some of these non-food treats.
Now for a child, these might not be the most exciting treats to receive on Halloween. However, the candy alternatives are not bad to have to help balance out the amount of candy they will be collecting.
HOW TO MAKE A DOLLAR STORE HALLOWEEN CANDY BOWL:
Now onto where to put all your candy or candy alteratives to prepare for the little trick or treaters. Helping to round out my fall decor, these DIY Halloween candy bowls came together quickly and easily. I had fun creating a different design for each of them with Cricut Design Space.
TOOLS AND SUPPLIES:
- Candy bowl, look here if you can’t find one at the Dollar Store
- Free SVG file, or Halloween design of your own
- Adhesive vinyl
- Transfer tape
- Standard Grip Mat
- Cricut, or any vinyl cutting machine
OPTIONAL TOOLS:
- Weeder set
- Scraper
- Vinyl letters or decals (if you don’t have a cutting machine)
INSTRUCTIONS:
1. DOWNLOAD OUR FREE SVG CUT FILE OR CREATE A FUN HALLOWEEN DESIGN
Perhaps, this is where you can let your creativity show by making a unique Halloween design of your own. From black cats and witches to using the words Trick or Treat in a themed font, the possibilities are endless.
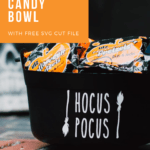
However, with Halloween fast approaching, maybe you are looking to make a quick, but personalized Halloween candy bowl of your own. That is where our free SVG cut file comes in handy with the words Hocus Pocus, in fun Rae Dunn inspired font, with the witches’ brooms. It is super easy to upload into Cricut Design Space to get you started on your own Halloween candy bowl.
These Printables and/or SVG designs are exclusive for A Home To Grow Old In subscribers to download for FREE. Just sign-up below and you’ll receive an email with the information to access the resource library that contains the SVG.
Once you’ve confirmed your email address, you’ll be enrolled in our weekly newsletter full of our latest posts as well as content that is exclusive for A Home To Grow Old In subscribers. Plus, you’ll have access to our Resource Library that is full of free printables and SVG cut files.
Free printables and SVG files from A Home To Grow Old In are for your own PERSONAL USE ONLY.
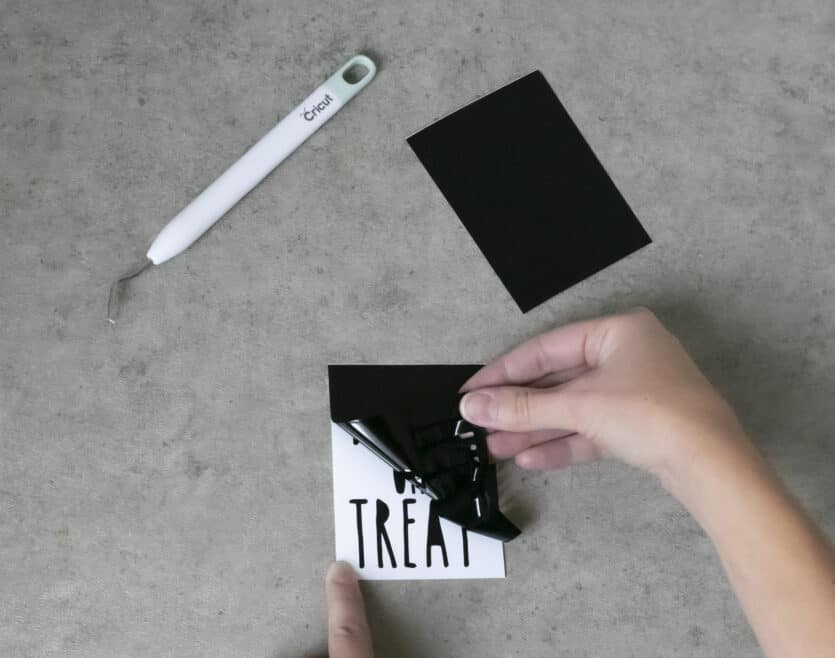
2. CUT DESIGN OUT USING ADHESIVE VINYL
After your design is ready, cut it out on adhesive vinyl using your Cricut. I have the Cricut Maker, which is their latest version. It’s an electronic cutting machine that can cut vinyl, paper, fabric, faux leather, balsa wood, and more. The Cricut uses different tools from blades and scoring wheels to pens that cut, draw, and emboss on these mediums, making the possibilities endless. The machine really won over my crafting heart with what it can do, so worth it!
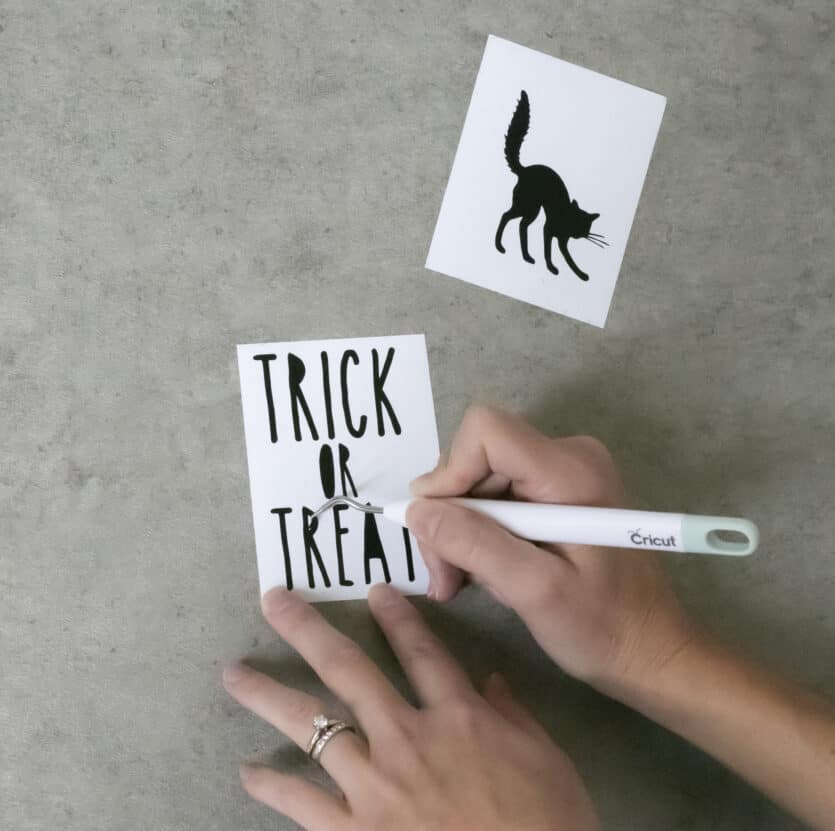
3. WEED ADHESIVE VINYL DESIGN
Weed your design by removing all the negative pieces, leaving the liner intact. While you can do this part by hand, having the weeding tool set does make this part go faster and easier.
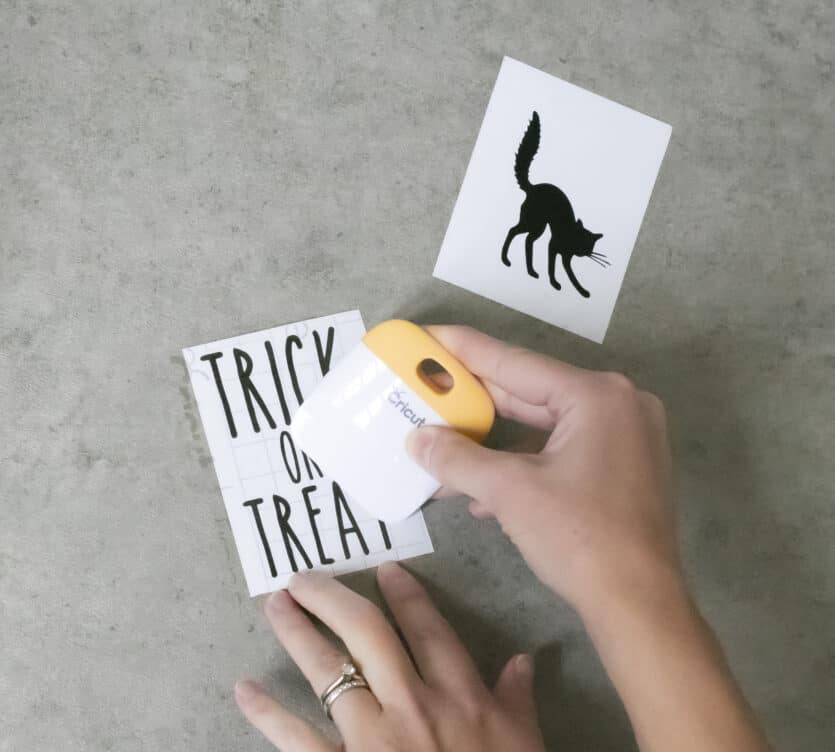
4. PREPARE VINYL DESIGN WITH TRANSFER TAPE
After all the negative pieces are off the liner, it’s time to put your design on the transfer tape. Remove the transfer tape liner and carefully place the transfer tape, adhesive side down, on your design. Now burnish (rub) the tape onto the vinyl to ensure it sticks firmly. While a credit card works well for this part, it is helpful having the scraper.
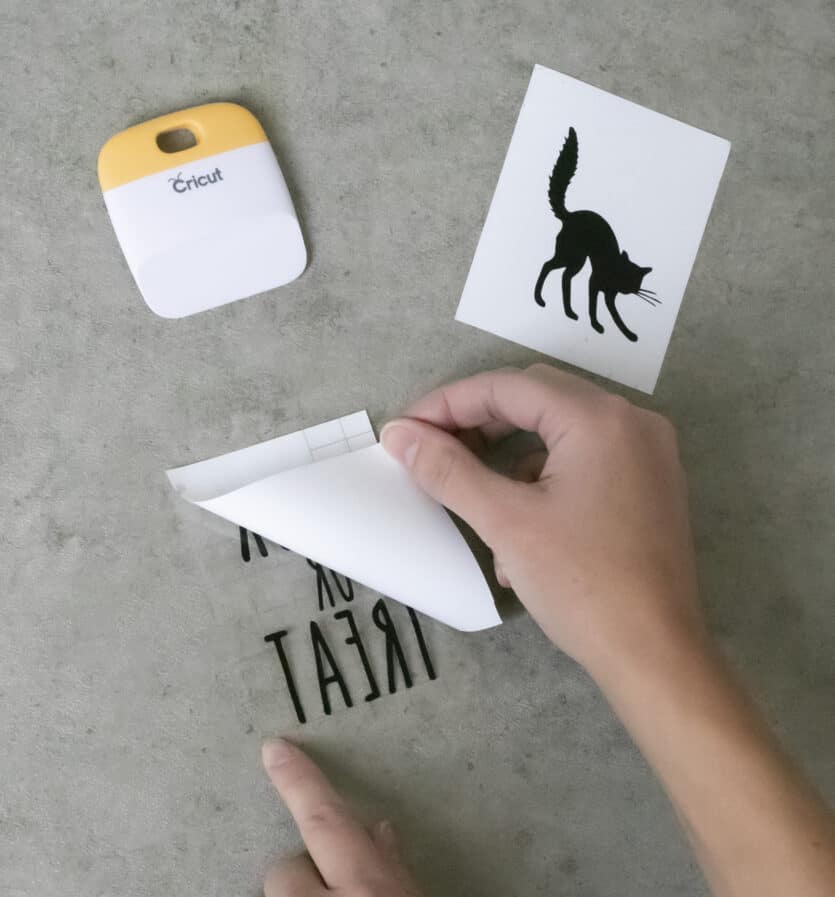
After the transfer tape is on, slowly peel the vinyl liner off at a 45 degree angle. If any of the vinyl sticks, rub the transfer tape with the scraper again, then continue to peel the liner off. I found it helpful to also burnish the backside of the vinyl design, directly on the liner. It made it easier to peel the liner off without the vinyl sticking.
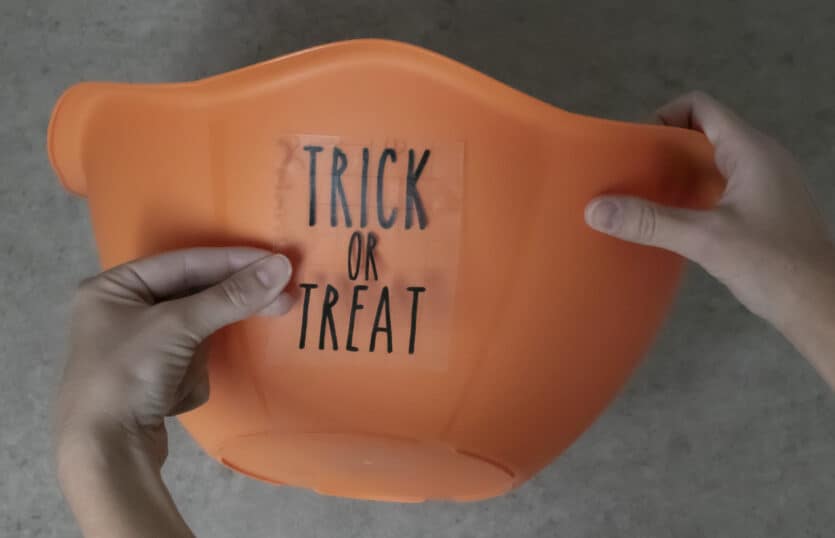
5. APPLY DESIGN TO SURFACE
Make sure your Halloween candy bowl is clean and dry prior to applying the design. Carefully apply the design, using the grid on the transfer tape to help you with layout position.
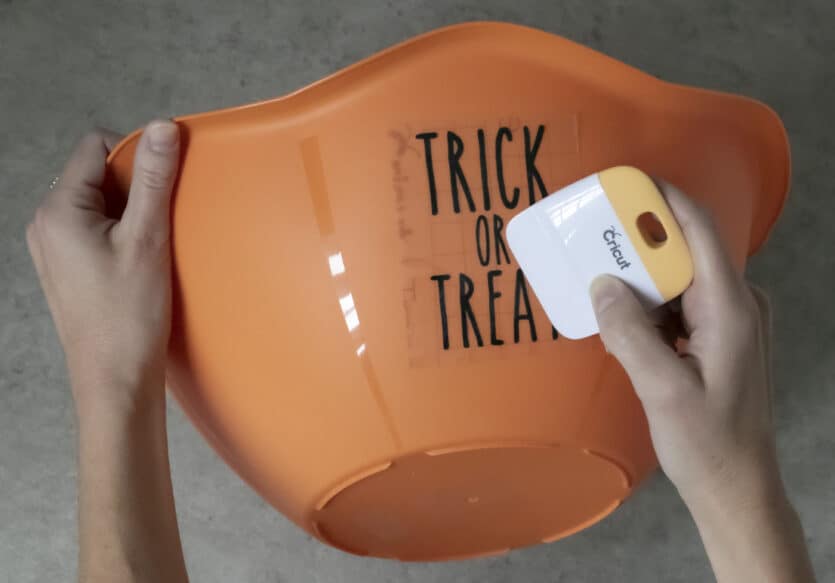
Once your design is where you want it on your Halloween candy bowl, use your scraper to burnish it. Starting from the center and working out to the edges is helpful in removing bubbles. Afterward, slowly peel the transfer tape off at a 45 degree angle. Same as above, if any of the vinyl is still sticking to the tape, then just rub it with the scraper and try peeling again. I find the vinyl sticks quite well to the surface and I don’t have much trouble peeling off the tape.

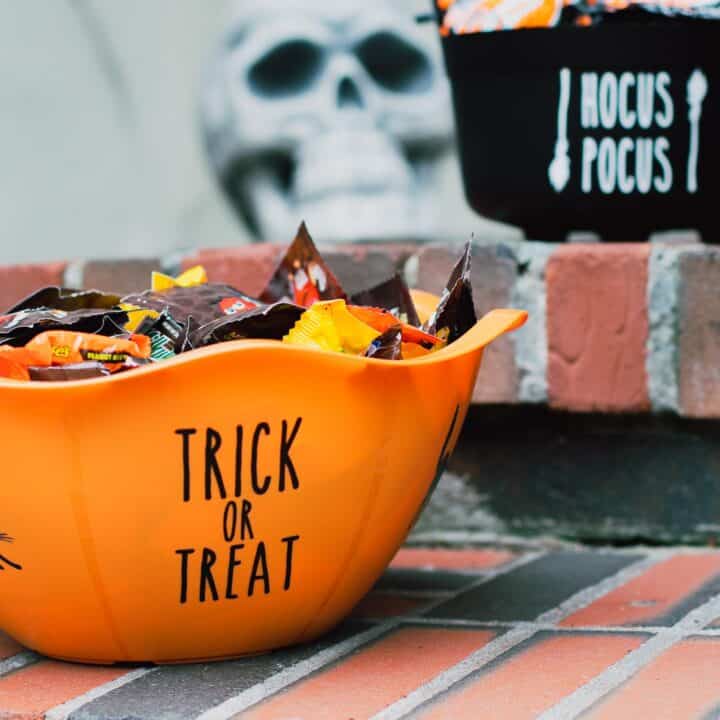
6. FILL HALLOWEEN CANDY BOWL WITH CANDY!
Your fabulous Halloween candy bowl is now ready for all your trick or treaters. Who needs a boring old candy dish when you can make this super easy and cheap DIY Dollar Store Halloween Candy Bowl.
DO I NEED A CRICUT TO MAKE A FUN DIY HALLOWEEN CANDY BOWL?
No, of course not. While I really enjoy making a variety of fun crafts with my Cricut Maker, you definitely don’t need one to make a DIY Halloween candy bowl. With the Dollar Store candy bowl, you can add other fun elements to decorate it for Halloween, such as paint, cardstock, stickers, or whatever your heart desires. You could also buy vinyl decals that are already cut and apply them to your bowl. I love seeing all the creative ideas that crafters come up with for DIY Halloween candy bowls. Black cats and witches’ brooms are a fun go to for stickers. You can even find different letters at the craft store and spell out Hocus Pocus and Trick or Treat.
Dollar Store Halloween Candy Bowl
A cheap and easy way to make a Rae Dunn Inspired Dollar Store Halloween Candy Bowl with a free SVG file that makes a great place to hold all your trick or treat candy.
Materials
- Candy bowl
- Free SVG file or design of your own
- Adhesive vinyl
- Transfer tape
Tools
- Cricut
- Weeder set
- Scraper
Instructions
- Download our SVG file to upload into Cricut Design Space.
- Cut out design using adhesive vinyl.
- Weed adhesive vinyl design.
- Prepare vinyl design with transfer tape.
- Apply design to your surface.
- Fill your new Halloween candy bowl with candy!
Have a safe and fun Halloween!
What’s Next?
You may also enjoy these Halloween ideas on A Home To Grow Old In: